Incorporating science experiments for high school into the curriculum can transform mundane learning into an exciting experience of exploration and discovery. These hands-on activities allow students to understand the world around them through a scientific lens, providing the perfect opportunity for them to showcase their critical thinking and creative problem-solving skills. As an educator, embracing these experiments can make the classroom a dynamic place of inquiry.
Learners of all ages are enamored with scientific experiments:
P5 have been looking at changes of state in science, and today investigated the water cycle! We did an experiment with water & food colouring in a plastic bag to see if we could see any changes, and noticed signs of evaporation and condensation inside the bag @SLC_RAiSE #Science pic.twitter.com/cla3opitiT
— Burgh Primary School (@BurghPrimary) October 25, 2023
Looking to rev up your high school science lessons? Look no further than these 18 super cool and engaging experiments! Not only will they teach your students important scientific concepts, but they’ll also inspire a lifelong love of learning and curiosity about the natural world. From bubbling chemical reactions to mind-bending optical illusions, these projects are the perfect way to make science more fun, accessible, and exciting for your students. So grab your lab coat and get ready to dive into the world of science!
This article will equip high school teachers with an arsenal of exciting science experiments that will keep their students engaged and learning. Offering projects across a variety of disciplines, from physics to biology, this carefully curated list will be suitable for learners at any level. By incorporating these experiments into their lesson plans, educators will be providing their students with valuable hands-on experience that complements their textbook knowledge. With easy-to-follow instructions and materials that are easily accessible, teaching science has never been more enjoyable!
These 18 experiments will help you diversify your lessons and instill in your children a love of your subject.
| Experiment | Details |
|---|---|
| 1. Investigating Osmosis with Potato Slices |
|
| 2. Making a Homemade Volcano |
|
| 3. Exploring Density with Oil and Water |
|
| 4. Building a Simple Electric Motor |
|
| 5. Testing Acids and Bases with Red Cabbage |
|
| 6. Observing Microorganisms with a Microscope |
|
| 7. Studying Chemical Reactions with Alka-Seltzer |
|
| 8. Measuring the Speed of Light with a Microwave Oven |
|
| 9. Demonstrating Newton’s Third Law of Motion with Balloons |
|
| 10. Observing the Greenhouse Effect with Sunlight and Jars |
|
| 11. Investigating Chromatography with Markers |
|
| 12. Creating a Simple Electromagnet |
|
| 13. Examining Photosynthesis with Leaf Disks |
|
| 14. Extracting DNA from Strawberries |
|
| 15. Building a Mini Tesla Coil |
|
| Additional 3 Fun Science Experiments for High School |
Experiment 1: Investigating Osmosis with Potato Slices
The magic of osmosis and its significant effects on plant cells is a concept that can truly enchant high school students. Delving deep into the world of science, these students will be provided an opportunity to witness this phenomenon through an intriguing potato experiment. By submerging potato slices into distinct solutions, students will not only observe but also internalize the intricate process of water moving in and out of the cells. This hands-on approach aids in comprehending concepts like osmosis, diffusion, and molecular motion more effectively.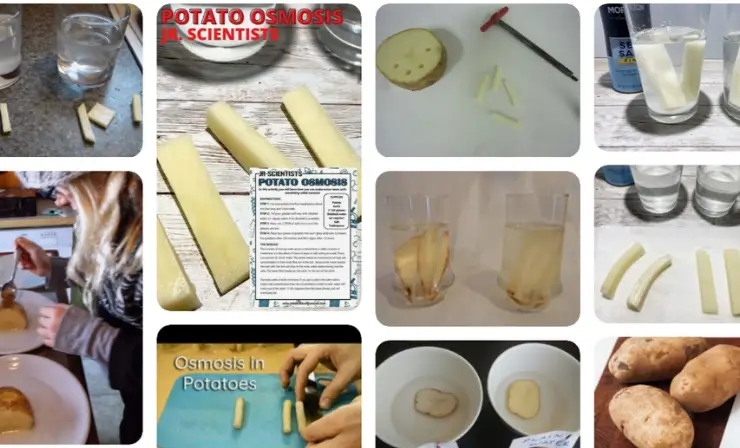
Materials needed:
- 3-4 fresh potatoes
- A sharp knife for precise slicing
- Salt and sugar for creating varied solutions
- Clean water
- A measuring cup for accurate measurements
- Three distinct bowls for the separate solutions
Steps:
- Begin by slicing the potatoes into even, thin slices.
- Arrange these slices into the three individual bowls.
- Pour plain water into the first bowl, a saltwater solution into the second, and a sugar water mix into the third.
- Let the potato slices immerse for about an hour.
- Post the soaking period, extract the potato slices. Carefully observe and note down the alterations in their look and feel.
This accompanying video offers a visual guide on how this osmosis project is conducted using potatoes. By the end, students will have a vivid understanding of osmotic movement and its effects.
Experiment 2: Making a Homemade Volcano
High school students have a wonderful opportunity to step into the shoes of a scientist with this exciting and educational experiment. They can construct their very own volcanic eruption, right from the safety of their classroom or home! By synergizing baking soda with vinegar, students will get a firsthand view of a thrilling chemical reaction that mimics the grandeur of a volcanic eruption. Beyond the sheer fun and spectacle, this experiment serves as an enlightening experience, imparting deeper insights into the complex world of chemical reactions.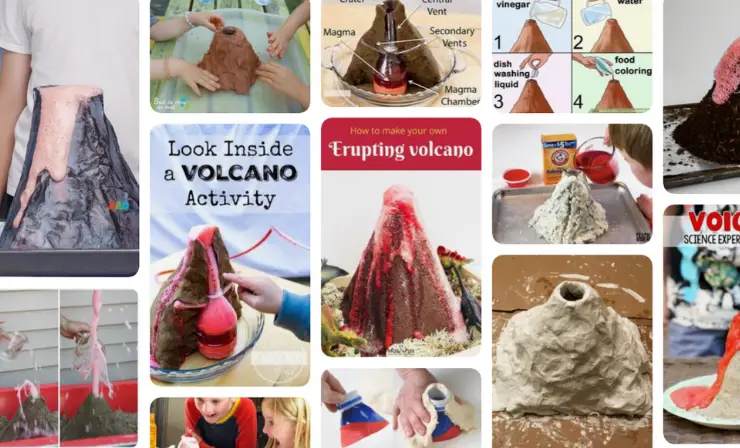
Materials needed:
- Baking soda, the primary reactant
- Vinegar, which will react with the baking soda
- Red food coloring for a realistic lava look
- A dash of dish soap to add a bubbly texture
- Play dough to mold the exterior of the volcano
- A compact container to hold the ingredients
- A funnel to ensure a controlled pour
Steps:
- Fashion a cone-shaped volcano with the play dough, securing it inside the small container.
- Mix in 1/4 cup of baking soda, introduce a few droplets of red food coloring, and combine a slight quantity of dish soap.
- Carefully pour the vinegar using the funnel and behold the magnificent eruption!
In this video, you will learn how to create your own homemade volcano using simple materials. You will see how the chemical reaction between baking soda and vinegar causes the eruption, and learn about the science behind it.
Experiment 3: Exploring Density with Oil and Water
High school students are about to embark on an enlightening journey into the mesmerizing realm of density and the profound ways it governs the interaction of various liquids. This hands-on experiment offers them a chance to observe the peculiar interaction between oil and water, two liquids that defy the very notion of unity. Witnessing their reluctance to mix will not only be visually appealing but will also serve as a vivid demonstration of the principles of density in action.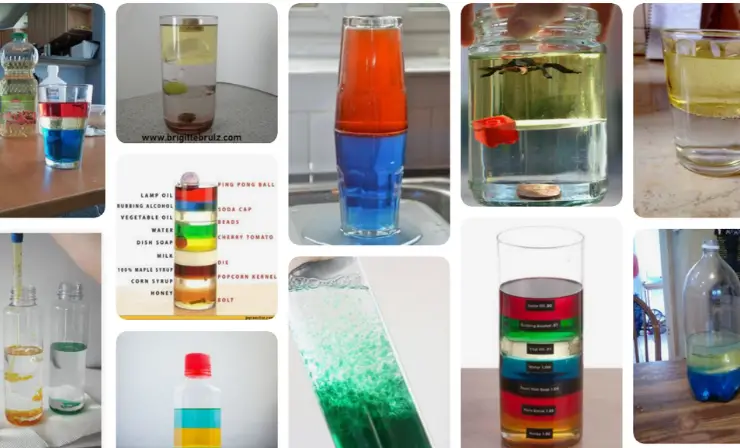
Materials needed:
- Vegetable oil, chosen for its distinctive density
- Clear water as the contrasting liquid
- Vibrant food coloring to enhance the visual appeal
- A transparent tall glass to clearly view the results
- A dropper for precision
Steps:
- Begin by filling the tall glass to its midpoint with water.
- Introduce a few vibrant drops of food coloring for a splash of color.
- Gradually introduce the vegetable oil into the glass, pouring steadily until the vessel is full.
- Carefully study the resulting layers of oil and water, noting their unique behavior.
In this video, you will learn about the concept of density and how it affects the behavior of liquids. You will see how oil and water don’t mix and form layers, and learn about the science behind it.
Experiment 4: Building a Simple Electric Motor
High school students possess an innate curiosity, constantly seeking to understand the world around them. Dive deep into the captivating realm of electromagnetism with this enlightening project, revealing the intricate process that enables an electric motor to effortlessly transform electrical impulses into tangible mechanical movements. As students embark on this hands-on journey, they’ll gain an intimate appreciation for the underlying principles that power much of today’s technology.
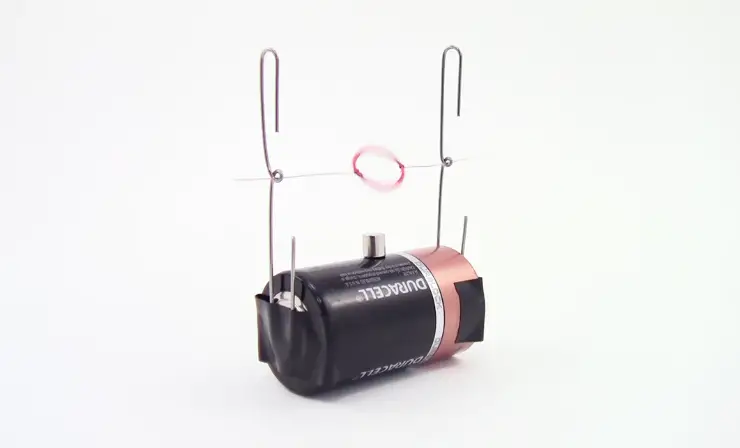
Materials needed:
- A standard battery, serving as the energy source
- Conductive wire, crucial for channeling electricity
- A common paperclip, which will showcase movement
- A magnet, embodying the essence of electromagnetic forces
- A rubber band, ensuring components stay in place
- Sharp scissors, assisting in the preparation
Steps:
- Begin by coiling the wire around the paperclip, ensuring both ends remain accessible.
- Connect one end of the wire meticulously to the battery’s positive terminal, while the other end interfaces with the paperclip.
- Position the magnet adjacent to the paperclip, utilizing a rubber band to hold it firmly.
- Observe in amazement as the humble paperclip springs to life!
Experience the mesmerizing magnificence of an electric motor as this video unravels the mystery behind its seamless conversion of electrical energy into mechanical power. Unlock the inner workings of this wonder machine in the science projects for high school.
Experiment 5: Testing Acids and Bases with Red Cabbage
This engaging educational activity presents high school students with a unique opportunity to explore the fascinating concept of pH and its impact on acid and base properties. The experiment involves the use of red cabbage as a natural pH indicator that allows students to readily detect color changes that are caused by differing substances introduced. Delving deeper into the science behind this project, the pigment molecule anthocyanin plays a crucial role, exhibiting color changes in direct response to pH variations.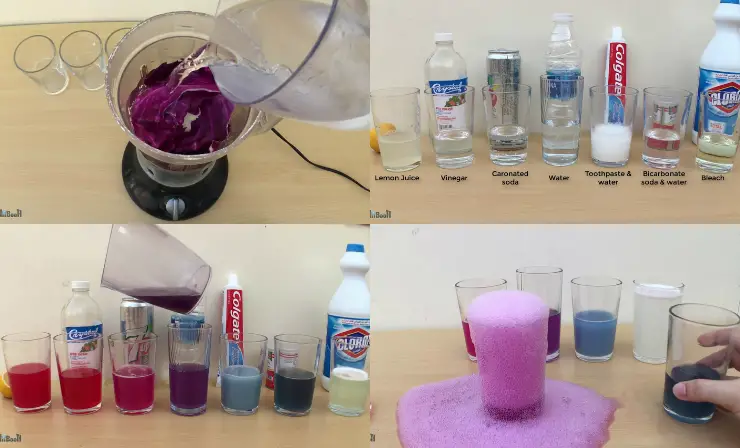
Materials needed:
- Red cabbage leaves
- Blender or food processor
- Strainer or cheesecloth
- Test tubes or clear cups
- Vinegar
- Baking soda
- Lemon juice
- Water
- Ammonia
Steps:
- Blend or process the red cabbage leaves with water until a liquid is formed.
- Strain the liquid into a container.
- Divide the liquid into separate test tubes or cups.
- Add a small amount of each substance to be tested (vinegar, baking soda, lemon juice, water, and ammonia) to a separate test tube or cup.
- Observe the color changes and record the results.
In this video, we’ll be testing household substances with red cabbage juice to determine whether they are acidic or basic.
Experiment 6: Observing Microorganisms with a Microscope
For high school students eager to uncover the hidden mysteries of our universe, the microscopic world offers endless wonder. This microbiology project opens the door to an otherwise invisible realm teeming with life, from intricate bacteria structures to mesmerizing protozoa and vibrant algae. Not only will you be observing these microorganisms, but you’ll also gain invaluable hands-on experience, mastering the art of slide preparation, microscope focusing, and the discernment of various microorganisms.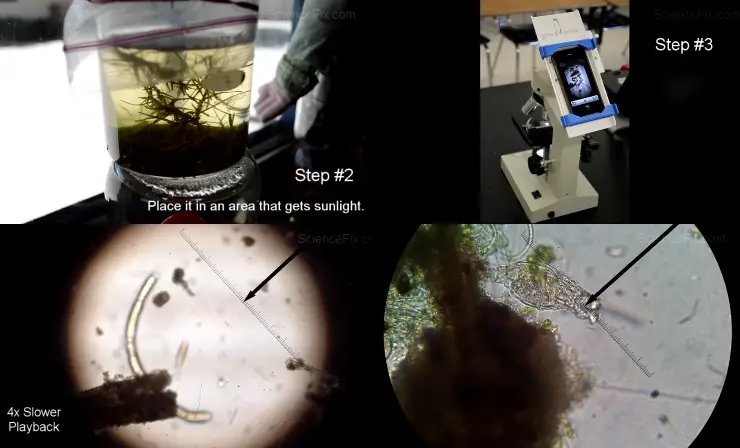
Materials needed:
- A high-quality microscope, your window into the minuscule
- Essential microscope slides and coverslips
- Precision dropper
- Pure water
- A toothpick, the bridge between our world and theirs
- Diverse microorganisms (Consider sources like pond water, tangy yogurt, or intriguing bread mold)
Steps:
- Start by depositing a single drop of water onto your microscope slide.
- With the aid of a toothpick, procure a minuscule sample of your chosen microorganism.
- Gingerly position this sample amidst the water droplet on your slide.
- Securely overlay your sample with a coverslip.
- Introduce your slide beneath the microscope’s gaze, fine-tuning the focus to unveil clear visuals of your microorganisms.
Get ready for a dynamic visual exploration of the microscopic world with this video! In this video, they’ll be collecting samples and observing microorganisms under a microscope.
Experiment 7: Studying Chemical Reactions with Alka-Seltzer Experiment
For high school science enthusiasts yearning for an experiment that’s as thrilling as it is educational, you’ve just stumbled upon the perfect discovery! This captivating experiment not only teaches the core principles of chemical reactions but also delivers a visual feast of effervescence. When Alka-Seltzer tablets meet water, they conjure an impressive display, producing carbon dioxide gas that showcases the magic of chemistry in real time. Understanding these reactions can be the foundation for more advanced scientific explorations in the future.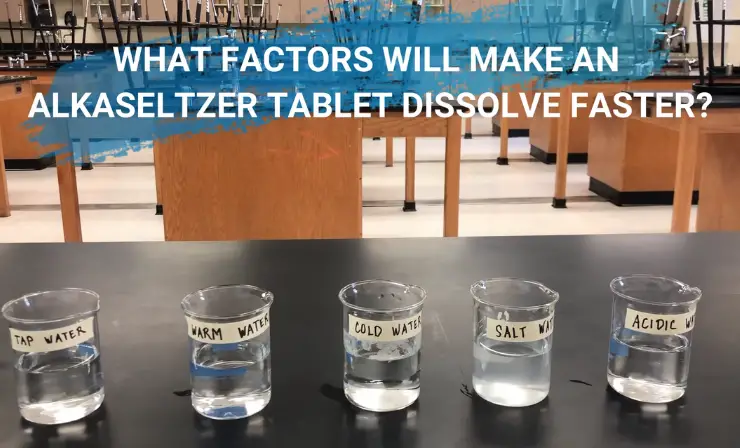
Materials needed:
- Alka-Seltzer tablets
- Crystal clear water
- A transparent plastic bottle or jar to witness the reaction in all its glory
- A balloon, to visualize the carbon dioxide production
Steps:
- Start by pouring water into your chosen transparent container.
- Gently introduce an Alka-Seltzer tablet into this aquatic environment.
- Without delay, fit the balloon snugly over the mouth of your bottle or jar.
- Become an observant scientist as the tablet orchestrates its dance with the water, culminating in the balloon’s expansion due to the released carbon dioxide gas.
For a more detailed, dynamic demonstration, watch the following video. It dives deep into the fizz-filled world of Alka-Seltzer chemical reactions. Prepare to be dazzled by the wonders of chemistry brought to life!
Experiment 8: Measuring the Speed of Light with a Microwave Oven
High school students, are you keen on exploring the fascinating realm of light speed in a fun and unique way? This ingenious experiment, tailor-made for you, unravels the mysteries of light speed using everyday items: a microwave oven and a chocolate bar. By keenly watching the melting patterns on the chocolate, students can decipher and compute the speed of light with remarkable precision.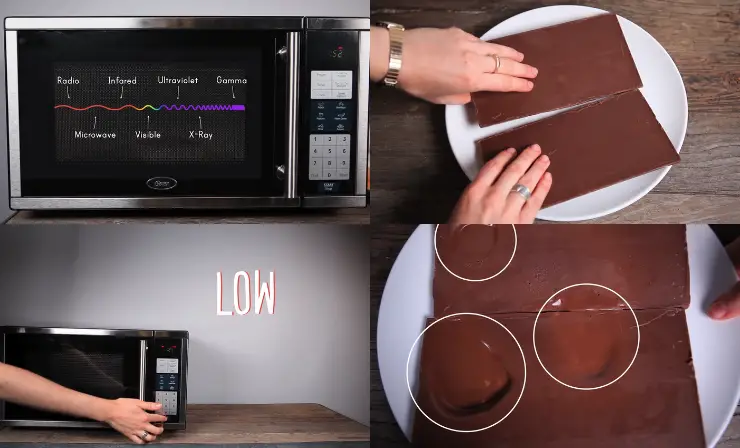
Materials needed:
- A common kitchen microwave oven
- Your favorite chocolate bar (any brand will do)
- A ruler for precise measurements
- A trusty calculator to crunch the numbers
- A sheet of paper to jot down your observations
Steps:
- First, lay the chocolate bar evenly on a microwave-safe plate and introduce it to the microwave.
- Power up the oven to its maximum setting, and let it run for precisely 10 seconds.
- Once done, keenly inspect the chocolate bar to identify the molten spots.
- With your ruler, gauge the exact distance separating these melted areas.
- Employing the formula: speed of light = distance between spots/time (recorded in seconds), compute the speed of light.
Are you curious about the speed of light and want to measure it yourself? With just a microwave oven and a chocolate bar, you can calculate the speed of light with this fun and easy experiment.
Experiment 9: Demonstrating Newton’s Third Law of Motion with Balloons
Experience the thrill of science experiments for high school with an exhilarating balloon propulsion activity. This experiment, perfect for curious students, offers a hands-on exploration of Newton’s Third Law of Motion, demonstrating the principle that every action has an equal and opposite reaction. Witness the fascinating phenomenon of air rushing out of a balloon and propelling it in the opposite direction, a vivid illustration of Newton’s foundational concept.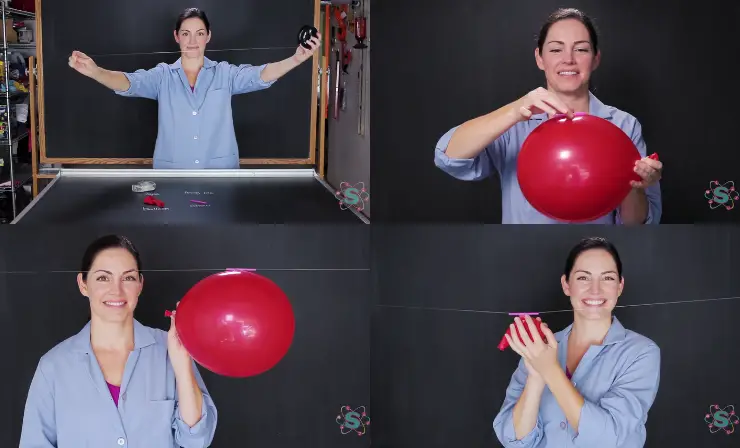
Materials needed:
- A collection of vibrant balloons
- Sturdy string to guide the balloons’ flight
- A couple of drinking straws
- Trusty tape to secure your setup
- A pair of scissors for accurate modifications
Steps:
- Secure one end of your chosen string to a balloon, while adhering the other extremity to a sturdy surface, perhaps a table or chair.
- Transform the straws into smaller segments using scissors and affix them onto the balloon using tape.
- Vigorously inflate the balloon, gripping it by the straw fragments.
- Let go of the balloon and marvel at its trajectory.
- Modify the experiment by adjusting the air volume within the balloon and note the variations in its path.
Have you ever wondered why launching a balloon across the room sends it in the opposite direction? This experiment will demonstrate Newton’s Third Law of Motion and show you how equal and opposite reactions work.
Experiment 10: Observing the Greenhouse Effect with Sunlight and Jars
Elevate the high school learning experience with this dynamic experiment centered around the intriguing greenhouse effect. Dive deep into the science of how solar energy interacts with varying substances enclosed in jars. This hands-on exercise allows students to not only observe but also understand the mechanisms driving this significant natural event impacting Earth’s climate. Melding ecological comprehension with lab fun, this project illuminates a cornerstone of environmental science.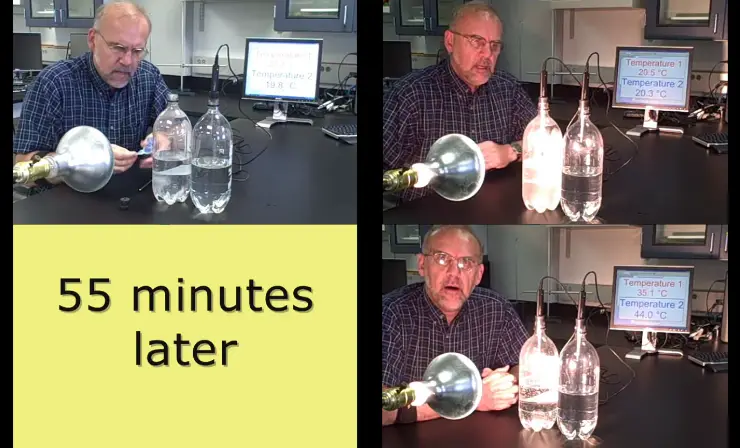
Materials needed:
- Sturdy glass jars for clear observations
- Accurate thermometers to record nuanced temperature shifts
- Black construction paper, known for absorbing more sunlight
- Reflective white paper
- Fresh water, symbolizing Earth’s oceans and seas
Steps:
- Pour water into one jar, leaving the second jar empty.
- Envelop the water-filled jar with absorbent black construction paper, positioning it under direct sunlight.
- Similarly, shroud the empty jar with reflective white paper and place it adjacent to the black-covered jar.
- Immerse a thermometer into both jars, meticulously noting down temperature variations at regular intervals.
- Analyze the thermal alterations between the two jars over a specific timeframe.
Ever pondered the intricate workings of the greenhouse effect and its profound implications for Earth? This experiment unravels its mysteries, demonstrating the differential heating effects of light on varied jar contents. Prepare to be enlightened by the illuminative wonders of environmental science!
Experiment 11: Investigating Chromatography with Markers
High schoolers are always looking for fun and engaging ways to learn about science. That’s why chromatography is the perfect experiment to capture their attention. Through this experiment, students get to witness the separation of inks or dyes into their individual components, making for a colorful display. Not only is it visually stimulating, but it also teaches the fundamental principles of chromatography – a process used in the medical and forensic sciences.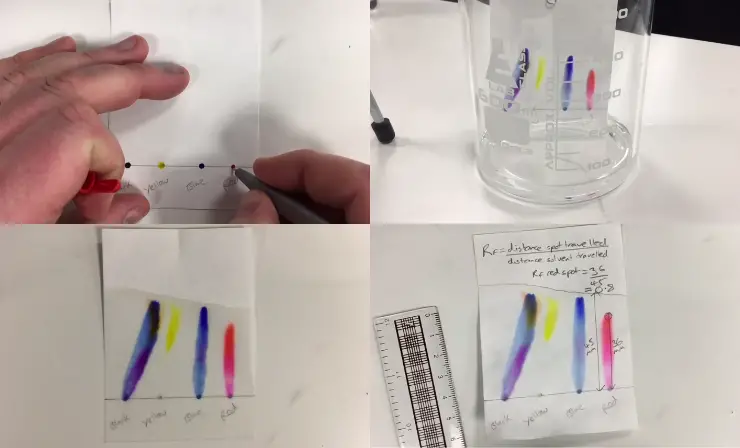
Materials needed:
- Coffee filter paper
- Pens or markers with water-based ink
- Rubbing alcohol or water
- Pencil
- Clear plastic cup
Steps:
- Cut the coffee filter paper into strips, and draw a small dot of ink in different colors near the bottom of each strip.
- Pour a small amount of rubbing alcohol or water into the clear plastic cup, and place the bottom of the coffee filter strip into the liquid.
- Use a pencil to secure the top of the strip to the edge of the cup, making sure that the bottom of the strip is just touching the liquid.
- Observe the inks as they move up the paper, and wait until the liquid has almost reached the top.
- Remove the paper strip and let it dry. Observe and identify the different colors that were separated by the chromatography process.
In this experiment, we will be investigating chromatography using everyday materials like coffee filter paper, pens, and rubbing alcohol. Watch as the colorful separation of ink molecules takes place before your very eyes!
Experiment 12: Creating a Simple Electromagnet
Discover the fantastic world of electricity and magnetism! With this experiment, high school students can delve into the intriguing relationship between these two concepts. Get ready to build an amazing electromagnet that will teach you how current flows and creates magnetic waves. You will uncover how the magnetic field produced can have practical applications in our daily lives.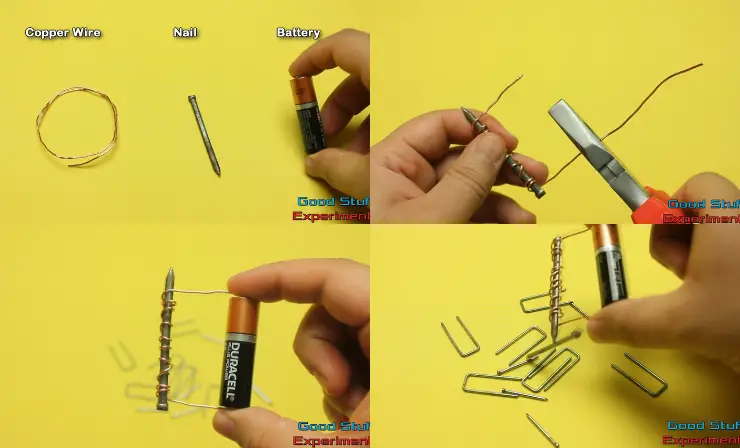
Materials needed:
- Copper wire
- Iron nail
- Battery (preferably a 9-volt battery)
- Paperclips
Steps:
- Wrap the copper wire around the iron nail, leaving about 6 inches of wire on either side.
- Connect one end of the wire to one end of the battery, and the other end of the wire to the other end of the battery.
- Test the electromagnet by touching the tip of the nail to a paperclip. The paperclip should be attracted to the nail and stick to it.
- Experiment with the number of turns of wire around the nail and the strength of the battery to see how these factors affect the strength of the electromagnet.
In this experiment, we will be creating a simple electromagnet using a few common materials like copper wire, an iron nail, and a battery. Discover how electricity and magnetism are intertwined, and learn about the practical applications of electromagnets in everyday life!
Experiment 13: Examining Photosynthesis with Leaf Disks
Invigorate your biology lesson with a dynamic experiment that highlights the fundamental concept of photosynthesis. Watch as high school students discover the magic of this process in action by extracting chloroplasts from fresh spinach leaves. By connecting the dots between the textbook and the real world, students will gain a deeper understanding of the intricate processes that make life possible.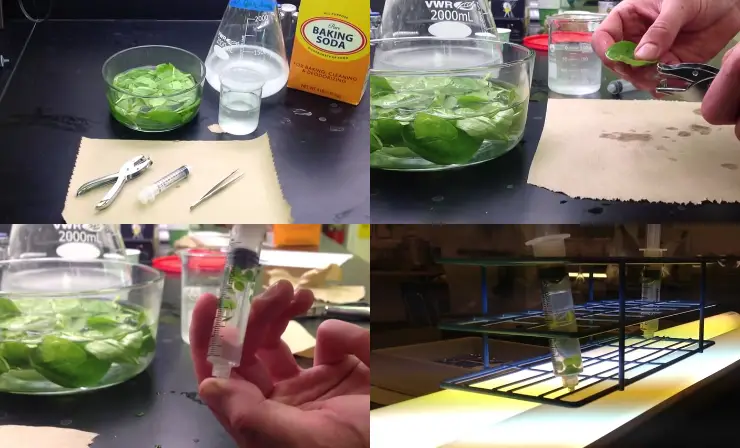
Materials needed:
- Spinach leaves
- Baking soda
- Distilled water
- Isopropyl alcohol
- Plastic syringes
- Clear plastic cups
- Light source
- Timer
- Sodium bicarbonate
- Soap
- Hole punch
- Paper clips
- Microscope slides and coverslips
Steps:
- Cut the spinach leaves into small pieces and blend them with distilled water to extract the chloroplasts.
- Mix a solution of sodium bicarbonate and distilled water to create a solution with a pH of 7.0.
- Fill a syringe with the solution and gently inject it into the leaf discs using a hole punch.
- Add a drop of soap to the solution to reduce surface tension.
- Put the leaf discs in the clear plastic cups filled with the sodium bicarbonate solution and place them under a light source.
- Start the timer and observe the leaf discs as they undergo photosynthesis.
- Record the time it takes for the leaf discs to float to the surface and record the rate of photosynthesis.
In this experiment, we’ll be examining photosynthesis with leaf disks. Watch as we extract chloroplasts from spinach leaves and observe the process of photosynthesis in action.
Experiment 14: Extracting DNA from Strawberries
Explore genetics through a DNA extraction experiment using strawberries. High school students will observe and extract DNA using household materials. By following steps, they’ll witness the tangible genetic code in cells. This experiment offers insights into DNA, genetics, and cellular biology fundamentals.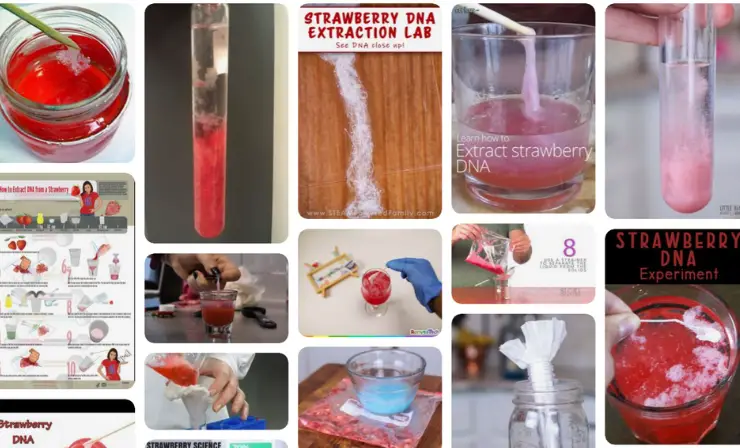
Materials needed:
- 3 large strawberries
- A Ziplock bag
- Dish soap
- Salt (1/2 tsp)
- Meat tenderizer (1/2 tsp)
- Water (1 cup)
- Coffee filter
- Funnel
- 2 tall glasses
- Rubbing alcohol (ice cold) to precipitate DNA
Steps:
- Place 3 large strawberries inside a Ziplock bag and carefully remove the air.
- Mash the strawberries inside the bag using your fingers until well mashed.
- In a separate cup, dissolve 1/2 tsp of salt, 1 tsp of soap, and 1/2 tsp of meat tenderizer into 1 cup of water.
- Pour this mixture into the Ziplock bag containing the mashed strawberries. Seal the bag and mix for another minute.
- Position a funnel over a tall glass, placing a coffee filter inside. Carefully pour the strawberry solution through the filter.
- Wait for the solution to filter into the glass. This will serve as the DNA extraction solution.
- In a second tall glass, add about 1/8 of ice-cold rubbing alcohol.
- Tilt the glass slightly and slowly pour the DNA extraction solution on top, allowing it to form a layer.
- After a moment, strands of DNA will begin to appear at the boundary between the extraction solution and the alcohol.
- Utilize the wooden stick to gather the DNA strands. This is the DNA extracted from the strawberries.
This accompanying video will guide students visually on extracting DNA from strawberries. By the conclusion of this experiment, students will possess a tangible understanding of DNA and its extraction process.
Experiment 15: Building a Mini Tesla Coil
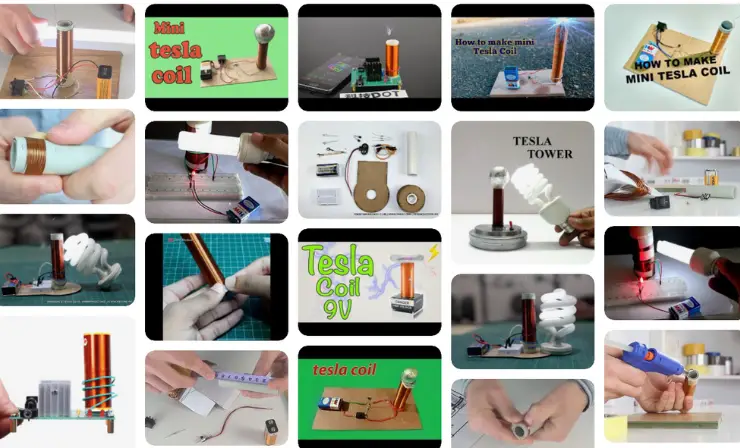
The wonders of electromagnetic fields and their applications in modern technology can captivate high school students. Diving into the realm of electronics, students will be introduced to the world of Tesla coils, a device that can wirelessly transmit electricity. Through constructing a mini Tesla coil, students will not only see but also grasp the principles of resonant transformers and wireless energy transfer. This hands-on project serves as an introduction to concepts like electromagnetism, resonance, and high-frequency oscillations.
Materials needed:
- Small PVC tube
- Copper wire (24-gauge)
- A 9V battery and connector
- A small neon light bulb
- Capacitor (0.002 uF)
- A switch
- Soldering iron and solder
Steps:
- Wind the copper wire tightly around the PVC tube, leaving some space at both ends.
- Connect one end of the wire to the capacitor and the other end to the 9V battery connector.
- Attach the switch between the battery and the coil.
- Solder all connections to ensure they’re secure.
- Once completed, turn on the switch and bring the neon light bulb close to the coil. It should illuminate without any direct connection.
- Observe the wireless transmission of electricity through the bulb’s illumination.
This video provides a step-by-step guide on building the mini Tesla coil. At the end of this project, students will have a clear insight into the principles of electromagnetic fields and their practical applications.
Additional 3 Fun Science Experiments for High School
As students progress through high school, they’re bound to encounter a wide range of scientific principles that can be hard to grasp through book learning alone. That’s where science experiments come in – they offer the chance for students to really engage with these concepts in a hands-on way, fostering a deeper understanding of the fundamentals.
Plus, when students are given the freedom to explore and experiment, they’re able to develop important critical thinking and problem-solving skills, as well as flex their creative muscles. It’s no wonder that science experiments are a vital part of any well-rounded high school education.
Experiment 16: Making Invisible Ink with Lemon Juice
Looking to add some excitement and thrill to high school chemistry labs? This experiment is a fantastic way to get students engaged and interested in the science behind invisible ink. By harnessing the power of organic compounds found in lemon juice, students will be able to create their own invisible ink and watch it appear right before their eyes when heated up. It’s a hands-on way to learn about chemical reactions, and it’s sure to leave a lasting impression on any young, aspiring scientist.
Materials needed:
- Lemon juice
- Water
- Bowl
- Cotton swab
- White paper
- Heat source (such as a light bulb or iron)
Steps:
- Mix lemon juice and water in a bowl in a 2:1 ratio.
- Use the cotton swab to write a message on the white paper using the lemon juice mixture.
- Allow the message to dry completely.
- Heat the paper with a light bulb or iron until the message becomes visible.
In this captivating experiment video, budding scientists can unlock the secrets of invisible ink with a little help from organic compounds found in lemon juice. Get ready to witness the magic unfold as students craft their own covert messages, and watch them materialize before their very eyes with a simple application of heat.
Experiment 17: Creating Rainbow Fire with Salt
Experience the magic of flame coloration with this energetic experiment. Get a firsthand look at how different compounds can affect flame coloration – from the bright yellow produced by salt to the unique hues created by copper sulfate and strontium chloride. Explore the fascinating world of chemistry and fire with this colorful demonstration.
Materials needed:
- Table salt
- Heat-resistant container (such as a ceramic bowl)
- Heat source (such as a lighter or match)
- Optional: copper sulfate or strontium chloride for additional colors
Steps:
- Sprinkle salt evenly into the heat-resistant container.
- Ignite the salt using a heat source.
- Observe the bright yellow color produced by the salt.
- For additional colors, add a small amount of copper sulfate or strontium chloride to the salt and ignite.
This video will provide you with an illuminating perspective on the captivating world of flame coloration. Discover the captivating shades that emerge from copper sulfate and strontium chloride, along with the vibrant yellow that salt can produce.
Experiment 18: Exploring Bioluminescence with Glowing Bacteria
This exciting experiment will introduce high school students to the fascinating world of bioluminescence. Through the use of a bacteria and sugar mix, students will have the opportunity to witness firsthand the incredible power of organisms, such as fireflies and glowing bacteria, that produce their own light. Get ready for an enlightening experience that will ignite your curiosity and leave you glowing with excitement!
Materials needed:
- Bioluminescent bacteria (such as Vibrio fischeri)
- White granulated sugar
- Water
- Flask or test tube
Steps:
- Mix a small amount of bioluminescent bacteria with a spoonful of white granulated sugar in a flask or test tube.
- Add water to the flask or test tube until it is about ¾ full.
- Shake the flask or test tube to mix the solution.
- Wait several hours for the bacteria to multiply and produce light.
- Observe the bioluminescence produced by the bacteria in a dark room.
In this video, you’ll discover the wonder of organisms that light up on their own, like magical fireflies and glowing bacteria. Using a special bacteria and sugar concoction, students will be amazed by the incredible display of light created by these tiny creatures.
For additional inspiration on school science projects, explore our other articles:
- 21 Science Experiments for Kids for All Ages
- 12 Exciting Science Experiments for Teens
- 15 Solar System Project Ideas
Useful Science Experiments Resources
- SSEC.si.edu — Discover a world of science wonders and excitement with these trusted and free online resources! Get ready to dive into the depths of interactive and engaging lesson plans and experiments that cater to high school students’ needs. From exploring the intricacies of the Smithsonian Science Education Center resources to aligning with national science standards, you’re bound to leave your students clamoring for more!
- ScienceMuseum.org.uk — Science museums and local science centers provide an exciting playground for both students and teachers. They are not just ordinary establishments, but a treasure trove of hands-on exhibits, workshops, and engaging programs that help explore science in a captivating and interactive way. These institutions are ideal for anyone looking to immerse themselves in the world of science while having fun at the same time.
- NSTA.org — Science teachers need to stay ahead of the game when it comes to teaching methods, curriculum updates, and technology advancements. To achieve this, they can take advantage of professional development opportunities. The National Science Teachers Association (NSTA) offers a range of options like workshops, conferences, and online courses to help educators refine their skills.
Conclusion
The world of science is endlessly fascinating, and introducing high school students to these concepts can be a thrilling experience. For teachers looking to inspire curiosity in their students, we recommend trying out these 18 science experiments for high school. From discovering the secrets of invisible ink to exploring the wonders of bioluminescence, these experiments are sure to ignite a spark of excitement in students. Not only do science experiments provide a memorable way to learn, but they also help students develop crucial problem-solving and critical-thinking skills.
