In 3rd grade, science education plays a transformative role in shaping young minds. As students progress from foundational learning to deeper understanding, their curiosity reaches its peak. Engaging science fair projects offer a gateway to scientific discovery, moving beyond traditional classroom teaching. By creating, executing, and presenting these projects, 3rd graders gain insights into scientific concepts and develop essential skills.
Science fair projects provide immersive experiences fueled by curiosity. Students become architects of their learning, exploring real-world phenomena, asking questions, and seeking answers. Bridging theory with practice, these projects make science tangible, igniting enthusiasm among young learners.
The impact of science fair projects extends beyond science itself. They foster critical thinking, nurture creativity, hone problem-solving abilities, and refine communication skills. This holistic approach blends knowledge with practicality, curiosity with collaboration, and individual exploration with shared learning.
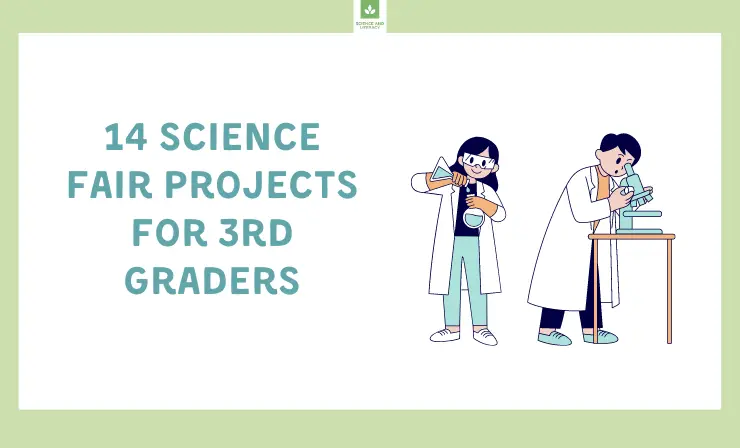
In the upcoming sections, we’ll explore 14 tailored science fair projects for 3rd graders. Each project aims not only to educate but also to spark wonder and excitement, leaving a lasting impression. Through these projects, we’ll witness the magic of education and curiosity intertwining, creating a vibrant tapestry of knowledge, growth, and an insatiable thirst for discovery.
After reading this article, you’ll get to know about:
- The Significance of Science Education in 3rd Grade→
- 4 Benefits of Science Fair Projects
- What Do 3rd Graders Learn in Science?→
| 1. Floating Egg Experiment |
|
| 2. Balloon Rocket Race |
|
| 3. Rainbow in a Jar |
|
| 4. Simple Circuit Project |
|
| 5. Plant Life Cycle Observation |
|
| 6. Solar System Model |
|
| 7. Volcano Eruption |
|
| 8. Homemade Lava Lamp |
|
| 9. Static Electricity Butterfly |
|
| 10. Bouncing Egg Experiment |
|
| 11. Solar Oven |
|
| 12. Water Cycle in a Bag |
|
| 13. Magnet Maze |
|
| 14. Edible Rock Cycle |
|
Discover the Importance of Science Education in 3rd Grade, Uncover the 4 Advantages of Science Fair Projects, and gain insight into the science curriculum for 3rd graders before diving into the projects.
The Significance of Science Education in 3rd Grade
The 3rd grade marks a pivotal point in a student’s educational journey, representing a phase of immense growth and cognitive development. As young learners transition from foundational skills to more advanced learning, their minds become fertile ground for cultivating a deeper understanding of the world. In the 3rd grade, students begin to bridge the gap between concrete and abstract thinking, as their cognitive abilities evolve to encompass more complex concepts.
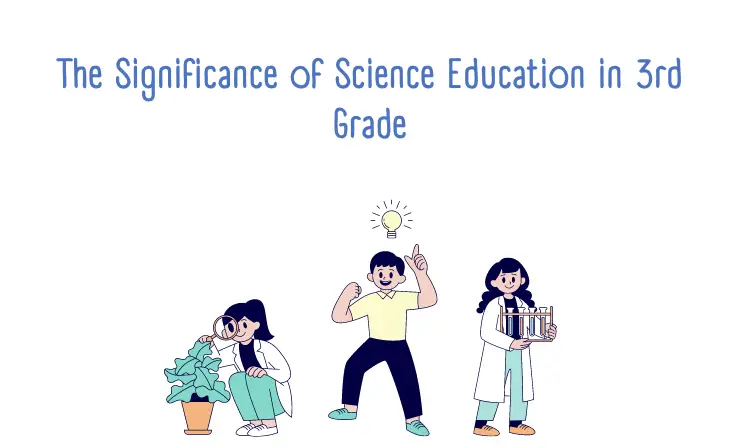
At this juncture, children are not only curious about the world but are also developing the cognitive tools to explore it in a systematic and structured manner. Their emerging ability to think logically, ask probing questions, and apply critical thinking to their observations makes the 3rd grade a fertile ground for introducing science education. By nurturing this curiosity through science education, educators lay the foundation for a lifelong appreciation of the subject. This early exposure to scientific concepts equips students with the foundational knowledge and skills necessary for their future academic pursuits and prepares them to be informed, engaged citizens who can navigate an increasingly complex and scientific world.
4 Benefits of Science Fair Projects
Science fair projects offer a myriad of invaluable benefits to 3rd graders that extend far beyond the classroom walls:
- These projects serve as a bridge that connects theoretical knowledge with real-world applications, providing hands-on learning experiences that are both tangible and relatable. By engaging with scientific concepts through practical experimentation, students develop a deeper understanding of the subject matter. As they actively participate in designing, conducting, and analyzing experiments, they transition from passive recipients of information to active contributors in their own education.
- Furthermore, the process of planning and executing science fair projects cultivates essential life skills. Teamwork is fostered as students collaborate with peers, brainstorm ideas, and share responsibilities. Effective communication skills are honed as students articulate their hypotheses, methodologies, and findings to their classmates, teachers, and parents. Presentation skills are polished as they deliver their findings in an organized and engaging manner, fostering confidence and poise from an early age.
- Additionally, science fair projects spark curiosity and a genuine excitement for learning. The hands-on nature of these projects taps into students’ innate desire to explore and discover, making learning an immersive and enjoyable experience. This, in turn, paves the way for the development of a growth mindset, encouraging students to embrace challenges, learn from failures, and persist in the face of difficulties.
- In essence, science fair projects are vehicles of holistic education. They not only convey scientific principles but also instill essential life skills, foster a passion for learning, and prepare 3rd graders for the ever-evolving demands of the future. Through the process of active exploration and discovery, these projects empower young learners to become confident, curious, and capable individuals who approach both education and life with a sense of wonder and possibility.
What Do 3rd Graders Learn in Science?
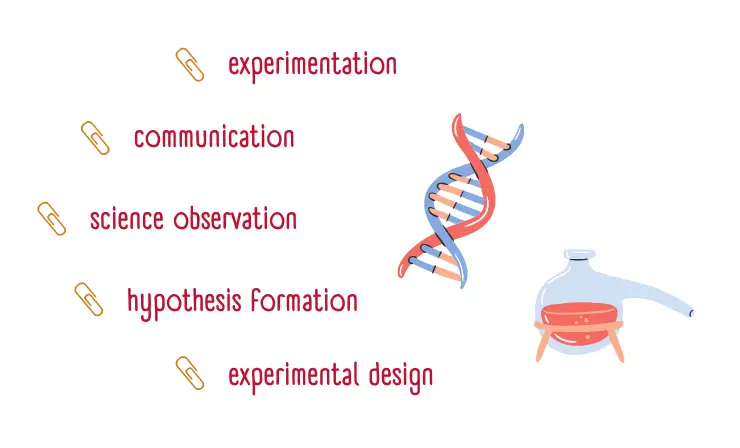
In the realm of 3rd-grade science education, students embark on a journey of discovery that mirrors the immersive nature of the curated science fair projects. The foundation is laid through the introduction of fundamental scientific concepts and processes. Much like the science projects encourage experimentation and communication, students learn the art of scientific observation, hypothesis formation, and experimental design. These skills not only echo the hands-on approach of the projects but also equip 3rd graders with the ability to investigate the world around them and effectively convey their findings.
Beyond the building blocks, 3rd graders delve into the diverse branches of science—life science, earth science, and physical science. This mirrors the multidisciplinary nature of the projects, where young learners encounter a tapestry of scientific realms. In life science, they explore living things, their characteristics, and ecosystems, paralleling their interaction with the natural world through experiments. The explorations extend to earth science, where they delve into the planet’s structure, atmosphere, and climate, mirroring their hands-on engagement with the environment. In the realm of physical science, students comprehend matter, energy, and motion, aligning with their manipulation of materials in experiments.
As students navigate the dynamic landscape of 3rd grade science, they foster critical thinking akin to the problem-solving elements of the science fair projects. By asking questions, analyzing data, and drawing conclusions, students are primed to address challenges and dissect complex scenarios. Just as the projects encourage drawing insights from data, 3rd graders are equipped to unravel patterns, make informed decisions, and approach problems strategically.
Furthermore, the correlation between 3rd grade science and everyday life mirrors the practical applications emphasized in the science fair projects. By recognizing the impact of the water cycle on agriculture or understanding the force of gravity’s influence, students grasp the tangible relevance of their scientific knowledge. This parallel enables them to appreciate science’s profound effects on the world, just as the projects merge theory with practice. The connections formed between 3rd grade science and everyday life cultivate a deeper understanding, inspiring students to pursue lifelong learning and cultivate a genuine affection for the realm of science.
My 3rd grader is doing her first science fair project, and it’s somehow one that I don’t already know the outcome for. She’s looking at how temperature affects magnetic strength. We’ll do a bunch of runs of using a magnet to pick stuff up at room temp, 1/x
— Humphrey Bogart’s Hairpiece (@Onychomys2) March 22, 2023
14 Engaging Science Fair Projects for 3rd Graders
Now, let’s delve into the realm of science fair projects. Explore a range of projects accompanied by detailed descriptions and instructional videos. These projects are designed to be relatively simple to execute, although occasional assistance from adults may be necessary for children.
1. Floating Egg Experiment
Explore the concept of buoyancy with this experiment. By adding salt to water in a tall glass, you’ll observe an egg floating. Discover the science behind why certain objects float while others sink.
Materials: Eggs, salt, water, tall glass
Level of Difficulty: Easy
Cost: Low
Steps:
- Fill a tall glass with water.
- Gently place an egg into the water. Observe that it sinks.
- Begin adding salt to the water while stirring until the egg starts to float.
- Record your observations and note the amount of salt required.
- Research and explain the scientific principles behind buoyancy and density.
View the video and adhere to the provided instructions. The video serves as an illustrative demonstration of how the experiment can be conducted.
2.Balloon Rocket Race
Embark on a journey to uncover Newton’s third law of motion. Create a balloon rocket by attaching a straw to a balloon and securing it with tape. Release the air from the balloon to propel the rocket forward and measure its distance traveled.
Materials: Balloon, string, straw, tape
Level of Difficulty: Moderate
Cost: Low
Steps:
- Attach a straw to a balloon using tape, ensuring it’s secure.
- Thread a length of string through the straw, creating a taut line.
- Find an open space and have a friend hold the string taut.
- Inflate the balloon and release the air, propelling the rocket along the string.
- Measure the distance the rocket traveled and record the results.
- Research and explain Newton’s third law of motion and the forces at play.
The video presents a demonstration of the experiment’s procedural steps. Additionally, the experiment can be undertaken as a challenge.
3.Rainbow in a Jar
Dive into the world of density by creating a rainbow in a jar. Layer liquids of different densities – honey, dish soap, water, and food coloring – to witness stunning separation and understand the principles of density.
Materials: Honey, dish soap, water, food coloring
Level of Difficulty: Easy
Cost: Low
Steps:
- Gather the liquids: honey, dish soap, water, and food coloring.
- Start by adding the heaviest liquid, honey, to the jar.
- Carefully pour the dish soap, followed by water and a drop of food coloring.
- Observe the distinct layers forming in the jar.
- Research and explain the concept of density and how liquids with different densities interact.
This video provides an explanation of density and illustrates the process of conducting the experiment. The video can serve as an instructional guide for performing the experiment.
4.Simple Circuit Project
Immerse yourself in the realm of electricity through a basic circuit project. Construct a simple circuit using a battery, wires, a bulb, and paper clips. Illuminate the bulb by completing the circuit, gaining insights into electricity flow and switches.
Materials: Battery, bulb, wires, paper clips
Level of Difficulty: Easy
Cost: Low
Steps:
- Gather the materials: battery, bulb, wires, and paper clips.
- Connect one end of a wire to the positive terminal of the battery and the other end to one side of the bulb.
- Attach a second wire to the negative terminal of the battery and the other end to the opposite side of the bulb.
- Use a paper clip to bridge the gap between the two ends of the wires, completing the circuit and illuminating the bulb.
- Experiment with switches by inserting a paper clip between the wires to break the circuit and turn off the bulb.
- Research and explain the flow of electricity in a circuit and how switches control it.
This video functions as a visual guide, offering instructions that can be utilized during your preparation for a science fair project.
5.Plant Life Cycle Observation
Witness the stages of plant growth with this project. Plant bean seeds in pots, nurture them with soil and water, and observe their transformation from seeds to thriving plants.
Materials: Bean seeds, pots, soil, water
Level of Difficulty: Easy
Cost: Low
Steps:
- Fill pots with soil and make a small hole in each.
- Plant bean seeds in the holes and cover them with soil.
- Water the pots regularly and ensure they receive sunlight.
- Observe and document the growth stages of the plants, including seed germination, sprouting, leaf development, and flowering.
- Research and explain the various stages of a plant’s life cycle.
This video offers a valuable resource for students aiming to enhance their science fair presentations. It provides comprehensive insights into the different stages of a plant’s transformation from a seed to a fruit. The content is skillfully simplified to cater to the understanding of primary school students, making it a useful tool for speech preparation.
6.Solar System Model
Embark on a cosmic journey by crafting a solar system model. Use different-sized balls and objects to represent the planets and their positions relative to the sun. Paint and label each planet to create a visually accurate representation of our solar system. Present your model and explain the order of the planets, their unique characteristics, and their relationship to the sun. This project offers an interactive way to learn about the vastness of space and the arrangement of celestial bodies.
Materials: Various-sized balls, paint, labels
Level of Difficulty: Moderate
Cost: Low
Steps:
- Gather different-sized balls to represent the planets. Use a larger ball for the sun.
- Paint each ball according to the color of the corresponding planet.
- Arrange the balls in their proper order and distance from the sun, following the real solar system layout.
- Label each planet with its name and distance from the sun.
- Research and explain the unique characteristics of each planet and their positions in the solar system.
- Present your solar system model and demonstrate your knowledge of the planets’ arrangement and features.
This video illustrates a method for painting your own planets. It provides a simple and efficient technique to create your customized solar system model quickly.
7.Volcano Eruption
Embark on an explosive journey by creating your own miniature volcano. Craft the volcano using clay, then simulate an eruption by combining baking soda and vinegar. Observe the chemical reaction that triggers the eruption and learn about volcanic processes in a fun and interactive way.
Materials: Baking soda, vinegar, clay, dish soap
Level of Difficulty: Easy
Cost: Low
Steps:
- Mold the clay into a volcano shape, leaving an opening at the top.
- Place the clay volcano on a tray or container to catch the eruption.
- Add a small amount of baking soda into the volcano’s opening.
- Mix dish soap with vinegar in a separate container.
- Pour the vinegar and dish soap mixture into the volcano.
- Observe the eruption as the mixture reacts with the baking soda, creating a bubbly foam that mimics volcanic activity.
- Research and explain the chemical reaction between baking soda and vinegar that causes the eruption.
The video showcases the process of creating a volcano and demonstrates how to conduct the associated experiment. By watching the video, you can learn how to construct your own volcano and replicate the experiment for yourself.
8.Homemade Lava Lamp
Fuse science and art with a homemade lava lamp experiment. Mix water, oil, and food coloring in a clear container, then drop an effervescent tablet to witness mesmerizing bubbles that resemble a lava lamp. Explore the science of density and chemical reactions while creating a visually captivating display.
Materials: Water, oil, food coloring, effervescent tablet
Level of Difficulty: Easy
Cost: Low
Steps:
- Fill a clear container with water, leaving some space at the top.
- Add vegetable oil to the container, ensuring it forms a separate layer on top of the water.
- Add a few drops of food coloring to the oil, which will gradually sink into the water.
- Break an effervescent tablet into smaller pieces.
- Drop a piece of the tablet into the container and observe as it interacts with the liquids.
- Witness mesmerizing bubbles that rise from the oil layer to the water layer and back.
- Research and explain the science behind the formation of bubbles due to chemical reactions and the role of density in this process.
This video provides detailed instructions on creating 11 different types of DIY lava lamps. Explore various methods and techniques to make your own mesmerizing lava lamp creations.
9.Static Electricity Butterfly
Unleash the power of static electricity by creating a butterfly that “flies” with the touch of a balloon. Inflate the balloon and generate static electricity, causing the tissue paper butterfly to levitate. Understand the science behind static charges and engage in a playful exploration of electric forces.
Materials: Balloon, tissue paper, thread
Level of Difficulty: Moderate
Cost: Low
Steps:
- Inflate a balloon and tie it to a stationary object.
- Cut out a butterfly shape from tissue paper and attach a piece of thread to its center.
- Rub the balloon against your hair or clothing to generate static electricity.
- Hold the charged balloon near the tissue paper butterfly.
- Observe as the butterfly is attracted to the balloon and hovers in the air due to the static charges.
- Experiment with different objects and distances to control the butterfly’s movement.
- Research and explain the phenomenon of static electricity and how opposite charges attract.
Watch the video to gain insights into the preparation process for the Static Electricity Butterfly science project. Discover the steps and materials required to successfully undertake this engaging experiment.
10.Bouncing Egg Experiment
Discover the extraordinary properties of eggs by conducting a bouncing egg experiment. Submerge a raw egg in vinegar to dissolve the shell, leaving behind a bouncy, membrane-covered egg. Explore the concept of osmosis and observe the egg’s transformation while investigating the inner workings of cellular membranes.
Materials: Raw egg, vinegar
Level of Difficulty: Easy
Cost: Low
Steps:
- Place a raw egg gently into a clear container.
- Carefully pour enough vinegar into the container to fully submerge the egg.
- Observe the initial reaction between the eggshell and the vinegar, which will create bubbles.
- Cover the container and let it sit for at least 24 hours.
- After 24 hours, carefully remove the egg from the vinegar and rinse it with water.
- Gently tap the egg on a surface to see how bouncy it has become due to the membrane.
- Research and explain the scientific processes of osmosis and the dissolution of the eggshell.
Observe the video to understand the essential steps in preparing for the Bouncing Egg science project. Acquire valuable insights into the necessary materials and procedures to effectively conduct this engaging experiment.
11.Solar Oven
Harness the power of the sun by constructing a solar oven using a shoebox, aluminum foil, and plastic wrap. Use the oven to heat small items and understand the principles of solar energy conversion. Delve into sustainable energy sources and the potential of harnessing sunlight for practical applications.
Materials: Shoebox, aluminum foil, plastic wrap
Level of Difficulty: Moderate
Cost: Low
Steps:
- Line the inside of the shoebox with aluminum foil, ensuring it’s reflective.
- Cut a flap in the box lid and cover it with plastic wrap, securing it with tape.
- Place small items, such as marshmallows or chocolate, on a tray inside the box.
- Set up the solar oven in direct sunlight, adjusting the flap to focus sunlight onto the tray.
- Monitor the temperature inside the oven using a thermometer.
- Observe as the items on the tray heat up and potentially melt.
- Research and explain the principles of solar energy conversion and its applications.
View the video tutorial to gain comprehensive guidance on preparing for the Solar Oven science project. Acquire a clear understanding of the required materials and step-by-step procedures to successfully execute this captivating experiment.
12.Water Cycle in a Bag
Condense the water cycle into a simple yet enlightening experiment. Fill a ziplock bag with water, seal it, and observe the water cycle in action as condensation forms on the bag’s interior. Witness evaporation, condensation, and precipitation in a miniature, controlled environment.
Materials: Ziplock bag, water, marker
Level of Difficulty: Easy
Cost: Low
Steps:
- Fill a ziplock bag with a small amount of water.
- Seal the bag, ensuring it’s airtight.
- Hang the bag in a sunny window or place it outside in direct sunlight.
- Observe as the water inside the bag heats up and evaporates.
- Over time, notice droplets of condensation forming on the inner surface of the bag.
- As condensation builds up, it may eventually resemble raindrops.
- Research and explain the stages of the water cycle: evaporation, condensation, and precipitation.
Observe the instructional video to acquire valuable insights on how to prepare for the Water Cycle in a Bag science project. Discover the essential materials and follow the step-by-step instructions provided to effectively conduct this enlightening experiment.
13.Magnet Maze
Embark on a magnetic adventure with a maze designed for a paperclip “magnet.” Construct a cardboard maze with hidden metal objects, guiding the paperclip through magnetic forces. Explore magnetism’s invisible yet powerful effects and navigate through the intricacies of magnetic fields.
Materials: Cardboard, magnets, metal objects
Level of Difficulty: Moderate
Cost: Low
Steps:
- Create a maze design on a flat piece of cardboard.
- Attach magnets to a paperclip, creating a “magnet” that can navigate the maze.
- Place small metal objects strategically within the maze’s walls.
- Hold the maze at an angle, allowing the paperclip “magnet” to move through the maze via magnetic forces.
- Use the magnetic field to guide the paperclip and navigate the maze’s twists and turns.
- Experiment with different angles and approaches to navigate the paperclip through the maze.
- Research and explain the principles of magnetism and magnetic fields.
Discover the process of crafting a magnet maze in this instructional video. The video demonstrates the creation of a maze using cardboard, popsicle sticks, and two rare-earth magnets. Learn how the maze functions as the indicator is maneuvered through it, experiencing resistance from the magnets upon encountering walls or dead-ends.
14.Edible Rock Cycle
Take a delectable journey through geology by crafting an edible rock cycle model. Mold layers of chocolate to represent different rock types, then use a mallet to mimic the forces that transform rocks over time. Learn about the rock cycle while savoring the sweet rewards of hands-on learning.
Materials: Chocolate, wax paper, mallet
Level of Difficulty: Easy
Cost: Low
Steps:
- Melt the chocolate and pour it into layers on a piece of wax paper.
- Create layers to represent different types of rocks (igneous, sedimentary, metamorphic).
- Let the chocolate layers cool and harden.
- Once hardened, use a mallet to break the layers into smaller pieces, symbolizing the rock cycle’s forces.
- Arrange the chocolate pieces to illustrate the stages of the rock cycle: melting, cooling, weathering, and pressure.
- As you enjoy the edible rock cycle, research and explain the geological processes behind rock formation and transformation.
Explore the process of conducting the Edible Rock Cycle science project in this informative video. The video provides step-by-step instructions on how to create the edible rock cycle model using chocolate and a mallet. Discover how the layers of chocolate represent different rock types and learn about the geological processes behind rock formation and transformation.
Useful Resources
- 18 3rd Grade Classroom Management Tips and Ideas
- Teaching 3rd Graders Problem Solving Skills
- How to Do a Great Elementary Science Fair Project and Board Layout
Conclusion
In the dynamic landscape of 3rd-grade science education, the power of hands-on learning shines through science fair projects. These 14 engaging science fair projects for 3rd graders offer a gateway to discovery, nurturing curiosity, critical thinking, and creativity. As these young minds delve into density towers, erupting volcanoes, and edible rock cycles, they forge a deeper connection with the world around them. Through these projects, 3rd graders not only grasp scientific concepts but also develop lifelong skills that fuel their journey of exploration and growth. The journey of scientific inquiry has never been more exciting, setting the stage for a future marked by wonder, learning, and unbridled curiosity.
Simona Johnes is the visionary being the creation of our project. Johnes spent much of her career in the classroom working with students. And, after many years in the classroom, Johnes became a principal.
Follow Simona: ![]()
![]()
![]()
![]()
- 5 Steps to Start Online Teaching - February 15, 2026
- Overview of 22 Low-Code Agencies for MVP, Web, or Mobile App Development - October 23, 2024
- Tips to Inspire Your Young Child to Pursue a Career in Nursing - July 24, 2024