As a teacher, it is always fun but can be challenging when introducing new topics to my students in the classroom, especially subjects as vast and intriguing as the solar system. One of my favorite topics is the solar system, a subject that naturally sparks wonder and curiosity among students. When I reach this topic in my students’ curriculum each year, I make sure that I include projects that will not only engage my students but also keep them deeply interested, turning complex concepts into memorable learning experiences.
At the beginning of my teaching career, transitioning between topics with my students was a significant hurdle. To make this process smoother, I focused on developing creative and interactive project ideas that could seamlessly bridge these transitions. Therefore, I wanted to help my readers by providing several solar system project ideas that they can use in their own classrooms.
The solar system gets an eco-friendly makeover.
Who says creating models of planets has to be wasteful? The latest project for students in Mr. Lopez’s class uses only recycled materials, and the results are out of this world!#Proud2BeD26 pic.twitter.com/KxoBkZFYGO— Three Oaks (@3OaksEagles) November 17, 2023
Drawing from my experiences, I have researched and used hundreds of these projects throughout my career. This has given me a wealth of knowledge in what works best in engaging young minds, so I can assure you that you will find at least a few great ones from my list, tailored to make learning about the solar system both enjoyable and educational.
After reading this article, you will officially know:
- Several solar system project ideas →
- How to introduce the solar system to students →
- And a few interesting facts about the solar system to tell students →
You can watch this video. It contains a brief retelling of the article.
Before I tell you about the project ideas, I suggest watching Chocolate I-scream’s YouTube video. This video will tell you how to create a solar system project model for children. It is a fun project you can begin with before getting into other projects on my list.
Below, I will provide you with my list of 17 different solar system projects that I believe every teacher should do with their students at least once. Here is the list of them:
| Idea | Details |
|---|---|
| 1. Hanging Mobile |
|
| 2. Solar System Cake |
|
| 3. Playdough Solar System Model |
|
| 4. Snow Globe Solar System |
|
| 5. Felt Model |
|
| 6. Pom-Pom Solar System |
|
| 7. Chalk Solar System |
|
| 8. Fruity Planets |
|
| 9. Solar System Poster |
|
| 10. Shadow Box |
|
| 11. Glow in the Dark Solar System |
|
| 12. Edible Solar System |
|
| 13. Solar System Bottle Caps |
|
| 14. Popsicle Sticks Solar System |
|
| 15. Balloon Solar System |
|
| 16. Solar System Flashcards |
|
| 17. Phases Of The Moon |
|
While searching for solar system projects for students, you will quickly learn that there are so many out there. I have compiled a list of my favorite ones that encourage my students to interact and enjoy learning about different parts of the solar system.
1. Hanging Mobile
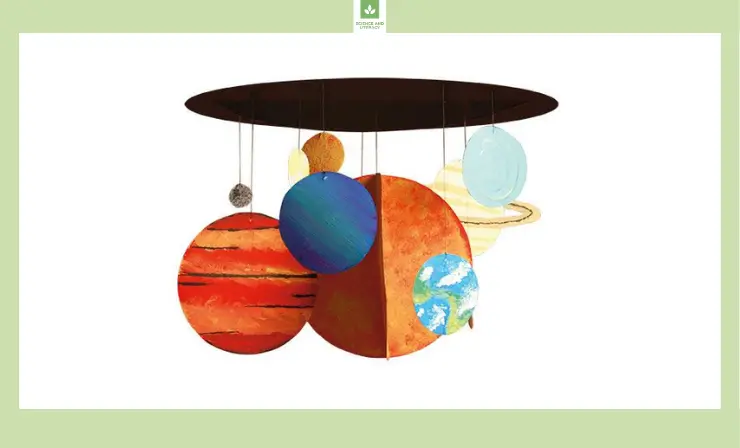
Create a stunning solar system mobile, a visual treat that brings the cosmic dance of planets into your classroom. This artistic project fuses creativity with astronomical knowledge, allowing students to build a model that physically represents the planets in orbit. It’s a captivating way to visualize the solar system, encouraging engagement and a deeper understanding of our cosmic neighborhood.
Materials Needed:
- Flashcards or cardboard
- Colored pencils, markers, or paint
- String or yarn
- Scissors
- Hole punch
Steps:
- Cut out circles from the flashcards or cardboard to represent each planet.
- Color or paint each circle to resemble the different planets, using reference images for accuracy.
- Punch a hole at the top of each planet cutout.
- Measure and cut strings of varying lengths for each planet.
- Attach the strings to the planets and suspend them from a hanger or a frame, arranging them in order from the Sun.
- Display your hanging mobile and use it as a visual aid to discuss each planet’s characteristics and position in the solar system.
Kick off your mobile project by watching this engaging video on crafting a solar system mobile. It offers step-by-step visual guidance, perfect for inspiring creativity and understanding the layout of our solar system while getting everyone excited about their own mobile creation.
2. Solar System Cake
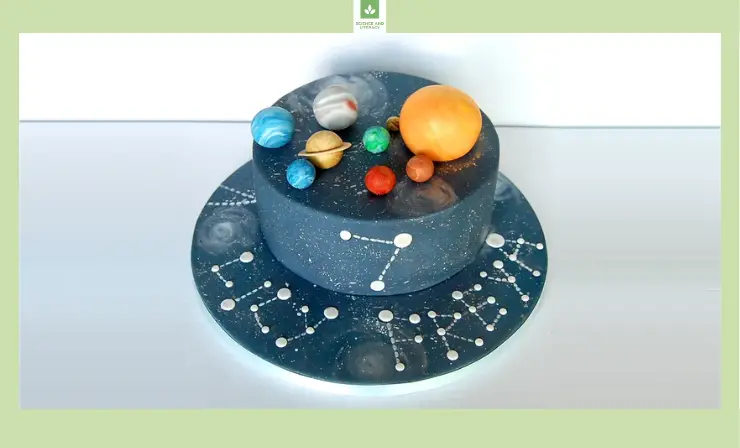
Whip up an appetizing and informative solar system cake, blending the art of baking with space exploration. This innovative project transforms a simple chocolate cake into a delicious representation of the solar system. Decorate with colorful candies to symbolize planets, creating a tasty and educational model that helps students visualize the vastness and beauty of space.
Materials Needed:
- Chocolate cake mix and ingredients
- Icing
- M&Ms, Skittles, or other circular candies
- Food coloring
- Round cake pan
Steps:
- Prepare and bake the chocolate cake according to the package instructions, using a round cake pan.
- Once cooled, apply a layer of dark icing to represent space.
- Use different colored candies to represent the planets. Place a large yellow candy or decorated cookie in the center for the Sun.
- Carefully place the planets in their respective orbits around the Sun.
- Use icing or edible markers to draw orbit rings and label each planet.
- Once complete, review each planet with the students before slicing and enjoying the cake.
Introduce the delicious project of making a solar system cake by showing this informative video. It demonstrates the fun and creative process of baking and decorating, capturing students’ interest and providing practical tips for their own cosmic confectionery masterpiece.
3. Playdough Solar System Model
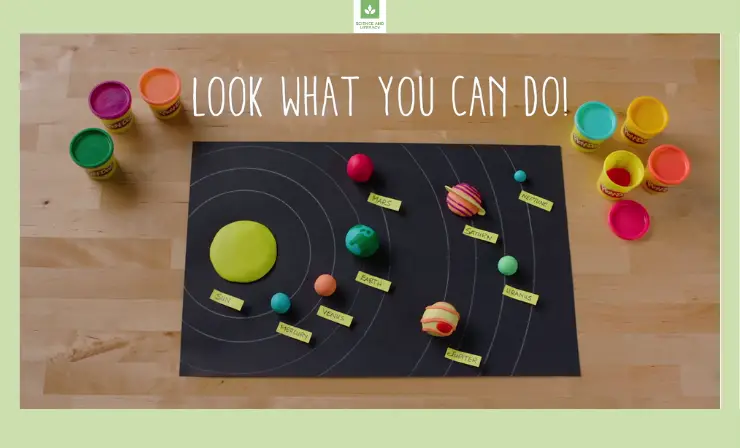
Dive into a tactile and fun learning experience with a Playdough Solar System Model. This hands-on activity encourages students to shape and mold the planets, facilitating a creative exploration of the solar system. It’s an effective way to engage young minds in understanding the composition and colors of the planets, enhancing their grasp of astronomical concepts.
Materials Needed:
- Different colors of playdough
- Black construction paper
- Rolling pin (optional)
- Reference images of planets
Steps:
- Roll out a large sheet of black construction paper to represent the vast, dark expanse of space.
- Utilize reference images of the solar system to accurately guide the creation of the Sun and each planet using vibrantly colored playdough.
- Carefully shape the playdough into spheres, thoughtfully varying the sizes to accurately reflect the actual sizes of the planets in our solar system.
- Thoughtfully arrange the planets on the black paper in their correct order from the Sun, maintaining an accurate representation of their positions.
- Use a rolling pin to flatten pieces of playdough that will effectively represent the orbits of planets around the Sun.
- Engage in an educational discussion about each planet’s unique features and characteristics as you meticulously create and place them in the model.
Start your Playdough model activity with this instructional video. It provides a visual and practical approach to modeling the solar system with playdough, enhancing students’ understanding of planetary sizes, colors, and positions in an engaging and tactile way.
4. Snow Globe Solar System
When the holidays are approaching, making a snow globe solar system is an excellent idea. The items you will need to do this are a mason jar, water, fishing wire, glue, glitter, paint, and clay. Begin making the planets out of the clay, but make sure you are making them small enough to fit inside the jar. Let the clay harden before painting each the color of the planets. Use the fishing wire to thread through the holes of the planets. Glue the other end of the wire to the bottom of the inside of the jar, so that your planets are hanging inside. Pour some water into the jar and add glitter. Then flip your jar upside down and shake it to watch the magic happen.
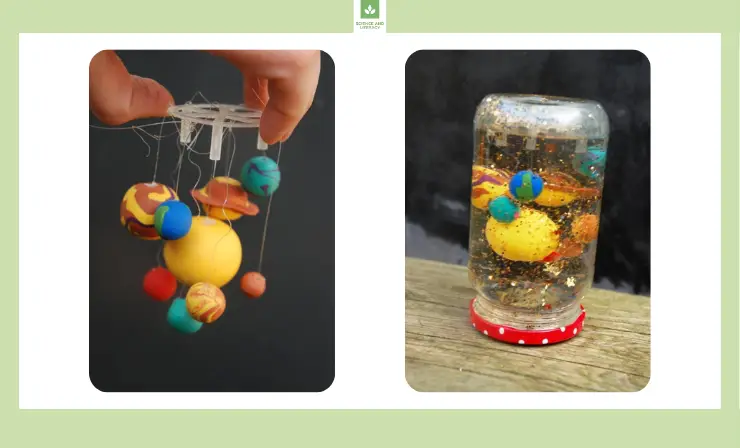
Create an enchanting snow globe solar system, a unique and artistic way to visualize the cosmos. This project, ideal for holidays or as a classroom display, combines crafting with learning about astronomy. Students will enjoy fashioning planets from clay and watching their miniature solar system come alive within a magical, glitter-filled snow globe.
Materials Needed:
- Mason jar with a tight lid
- Clay
- Water
- Fishing wire
- Glue
- Glitter
- Paint
- Small brush
Steps:
- Sculpt the planets from clay, ensuring they’re small enough to fit inside the mason jar.
- Allow the clay to harden and then paint each planet, mimicking their real colors.
- Once dry, use a needle to make a small hole in each planet.
- Cut pieces of fishing wire and thread them through each planet, securing them with glue.
- Attach the other ends of the wires to the inside of the jar lid, so planets appear to float.
- Fill the jar with water, and add a pinch of glitter for the ‘starry’ effect.
- Seal the jar and flip it to create a mesmerizing snow globe solar system. Shake gently to see the glitter swirl around the planets.
Begin your snow globe project with this enchanting video. It demonstrates how to encapsulate the beauty of the solar system in a snow globe, offering creative ideas and encouraging students to visualize and represent the cosmic dance in their own unique way.
5. Felt Model
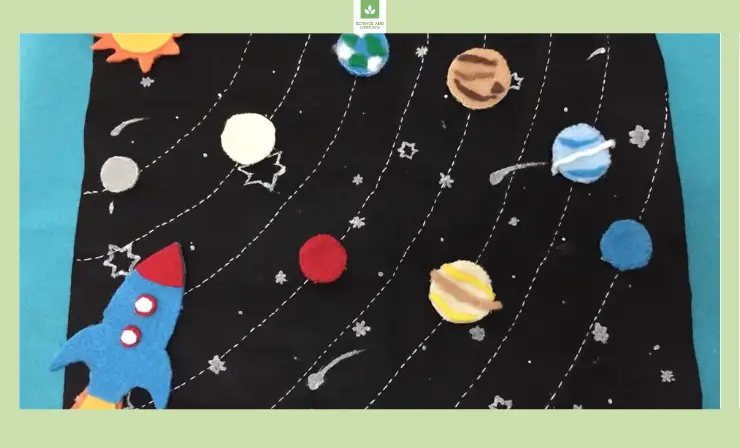
Create a sensory-rich felt model of the solar system, ideal for engaging young learners in a tactile learning experience. This project encourages the exploration of planetary characteristics through touch and sight, using different colored felts to represent each planet. It’s a wonderful way to combine craft and education, fostering a deeper understanding of our solar system in a fun and interactive way.
Materials Needed:
- Various colors of felt
- Black felt sheet
- Scissors
- Glue or Velcro (optional)
Steps:
- Carefully cut out circles from various colored felts to accurately represent each planet in our solar system.
- Utilize a large piece of black felt as a backdrop, effectively symbolizing the vast, dark expanse of space.
- Engagingly discuss each planet’s unique attributes as you place them on the black felt, using glue or Velcro for secure attachment.
- Actively encourage students to touch and rearrange the planets, thereby enhancing their sensory learning experience and interaction.
- Employ this tactile model as a dynamic visual aid to explain planetary positions and distinct characteristics in the solar system.
Play this detailed video to guide students through creating a solar system felt model. It offers a step-by-step visual tutorial, ensuring students grasp the concept and can confidently replicate it with their own materials, fostering hands-on learning and creativity.
6. Pom-Pom Solar System
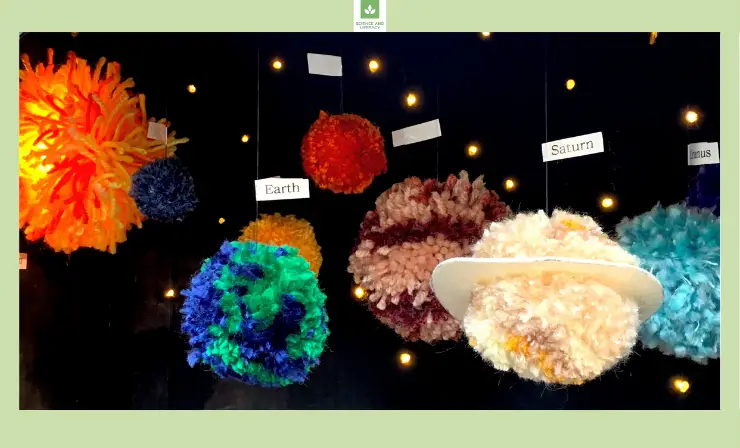
Craft a colorful and simple pom-pom solar system, perfect for visual learners. This engaging project uses multicolored pom-poms to represent the planets laid out on a black cardboard background. Children will enjoy placing the pom-poms to form the solar system, providing a creative and hands-on approach to understanding the arrangement and colors of the planets.
Materials Needed:
- Multicolored pom-poms
- Black cardboard or construction paper
- White chalk (optional)
Steps:
- Carefully spread out the black cardboard or construction paper to visually represent the vastness of outer space.
- Strategically place pom-poms on the paper, thoughtfully assigning different colors to represent the diverse planets in our solar system.
- Optionally, utilize white chalk to meticulously draw orbits around the sun, creatively represented by a larger, distinctively colored pom-pom.
- Engage students by explaining each planet’s unique features and precise position in the solar system as you place each pom-pom.
- Actively encourage students to recreate the solar system model themselves, thereby enhancing their understanding and comprehension of the solar system’s complex structure.
This lively video on creating a pom-pom solar system is a great way to start the project. It shows the fun and colorful process, sparking creativity and offering a unique approach to visualizing the planets in our solar system.
7. Chalk Solar System
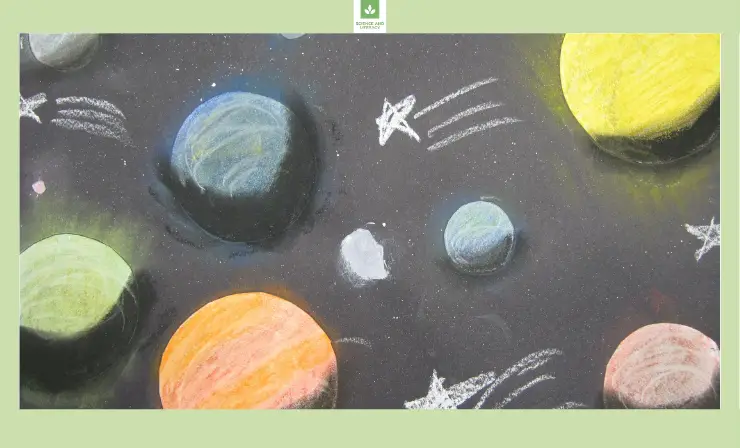
Bring astronomy outdoors with a vibrant chalk solar system. This activity transforms a concrete space into a large-scale model of our solar system, using colorful sidewalk chalk. It’s an exciting way for students to learn about the planets, their orbits, and sizes while enjoying the creative process of drawing and illustrating the solar system.
Materials Needed:
- Colorful sidewalk chalk
- A concrete or blacktop area
Steps:
- Gather the class and lead them outside to a spacious, suitable drawing area for this creative activity.
- Utilize the colorful chalk to meticulously draw a large-scale, detailed model of the solar system, carefully including each planet and its respective orbits.
- As you artistically render each planet, take the opportunity to explain, focusing on discussing its unique characteristics and precise position in the solar system.
- Once the main model is complete, warmly invite students to draw their own versions of the solar system, using your expansive chalk model as a visual reference.
- Foster an interactive and engaging environment by encouraging discussion and feedback about each student’s individual solar system creation to reinforce learning and understanding.
This video showcases how to draw a solar system using chalk, providing an artistic and interactive way to learn about the solar system. It’s perfect for visually guiding students through the process, encouraging them to replicate and personalize their own chalk solar systems.
8. Fruity Planets
Engage students with a delicious, edible representation of the solar system using various fruits. This creative project helps children visualize the sizes and colors of planets, fostering an understanding of our solar system in a fun and tasty way. It’s a unique approach that combines nutritional education with astronomy, appealing to both the senses and the mind.
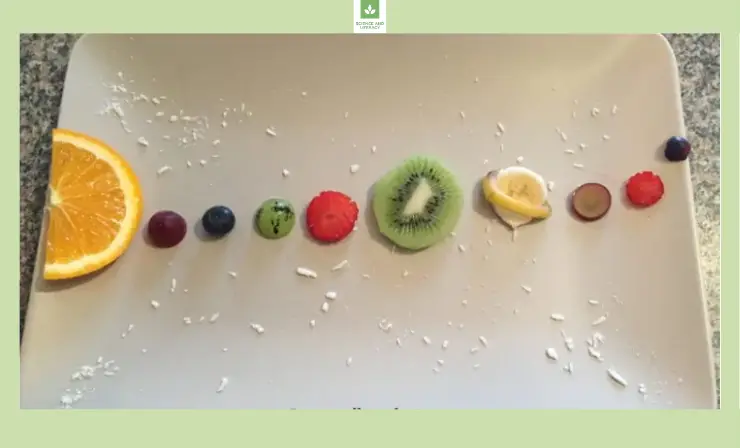
Materials Needed:
- A variety of fruits (e.g., green apple, orange, honeydew melon)
- Cutting board and knife
- Plates or trays
Steps:
- Begin by selecting a variety of fruits, each specifically chosen to represent a different planet, focusing on their unique color and size for accurate representation.
- Engage the students by vividly discussing the distinctive characteristics of each planet, simultaneously presenting the corresponding fruit to visually enhance the learning experience.
- Carefully cut the chosen fruits into slices or manageable segments, ensuring they are easy to handle and share among the students.
- Creatively arrange the fruit slices in sequential order on a large tray or table, meticulously forming an edible, fruity version of the solar system.
- Conclude the activity by inviting students to taste each fruit, adding an enjoyable, sensory dimension to their learning experience, further reinforcing their understanding of the solar system.
Introduce the concept of a scale solar system using fruit with this insightful video. It’s an excellent resource to visually demonstrate how everyday items can represent celestial bodies, making the vastness of space more comprehensible and relatable.
9. Solar System Poster
Develop a visually stunning solar system poster, combining art with astronomical education. This project involves painting a large black paper or poster board to represent space, with each planet depicted in vibrant colors. It’s an excellent way to help students recognize and remember planetary characteristics, promoting artistic expression and scientific learning.
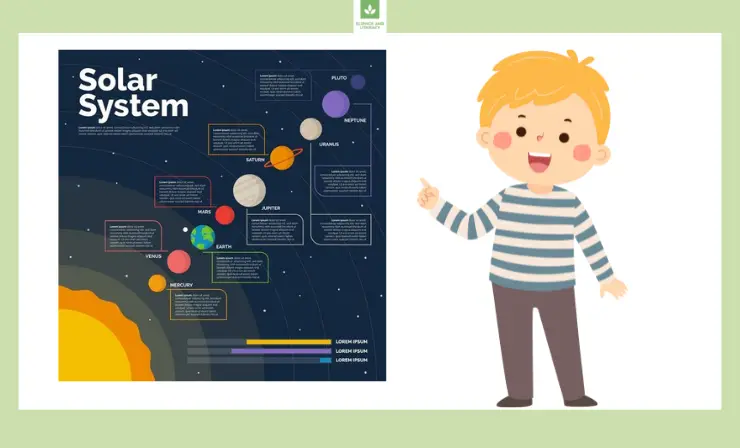
Materials Needed:
- Large black paper or poster board
- Paints (various colors)
- Brushes
- White pens or markers for labeling
Steps:
- Start by unfolding the large black paper, establishing it as the expansive backdrop to represent the vastness of outer space in your classroom.
- Skillfully paint each planet on the poster, thoughtfully varying their sizes and using a range of colors to accurately match their real-life counterparts in our solar system.
- Clearly label each planet using a white pen or marker, ensuring the names stand out distinctly against the dark background for easy identification.
- Proudly display the completed solar system poster in a prominent area of the classroom, using it as a visual aid to facilitate a comprehensive discussion about each planet.
- Provide each student with smaller pieces of black paper, encouraging them to unleash their creativity by designing and creating their own personal solar system posters.
Before starting your poster project, watch this video on solar system drawing. It provides artistic inspiration and guides students in creating a visually appealing and scientifically accurate solar system, perfect for turning into educational and decorative posters.
10. Shadow Box
Construct a three-dimensional solar system in a shadow box, offering a detailed and miniature view of the cosmos. This artistic and scientific project involves painting and arranging Styrofoam balls as planets within a box. It’s an engaging way to bring the solar system to life in the classroom, fostering a deeper appreciation of astronomy.
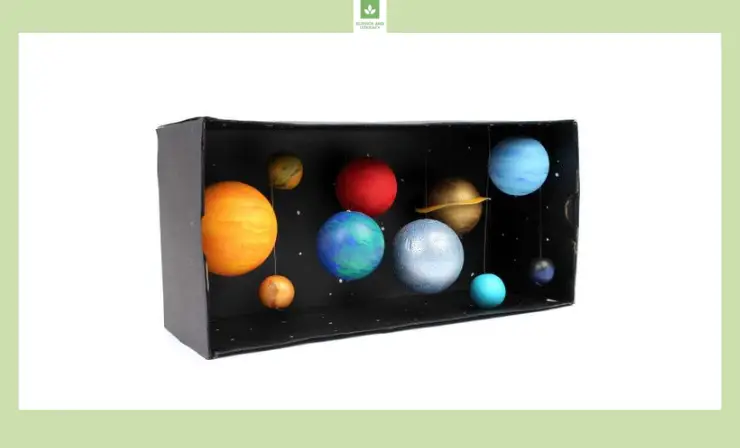
Materials Needed:
- Shoebox
- Black paint
- Styrofoam balls of various sizes
- Glow-in-the-dark stars
- Fishing line
- Needle and thread
Steps:
- Begin by meticulously painting the entire inside of the shoebox black, artistically transforming it into a miniature representation of the vast, dark expanse of outer space.
- Carefully paint each of the Styrofoam balls with vibrant, accurate colors and patterns to creatively resemble the diverse planets of our solar system in miniature form.
- Delicately suspend the painted planets inside the box using a transparent fishing line, ingeniously attaching them to the box’s lid to create a floating, orbit-like effect.
- For an added celestial touch, strategically place small glow-in-the-dark stars throughout the interior of the box, enhancing the overall space-like atmosphere with a sparkling effect.
- Use this intricately crafted shadow box as an interactive educational tool in the classroom, engaging students in lively discussions about the complexities and wonders of our solar system.
Show this video to illustrate the steps in creating a solar system shadow box. It’s a great visual guide that combines art and science, helping students understand spatial relationships within the solar system while tapping into their creative skills.
11. Glow in the Dark Solar System
Create an enchanting glow-in-the-dark solar system, adding a magical touch to astronomy lessons. This project uses special paint to illuminate the planets in darkness, offering a visually stunning representation of the solar system. It’s a fun and educational activity that highlights the beauty of the cosmos in a unique and interactive way.
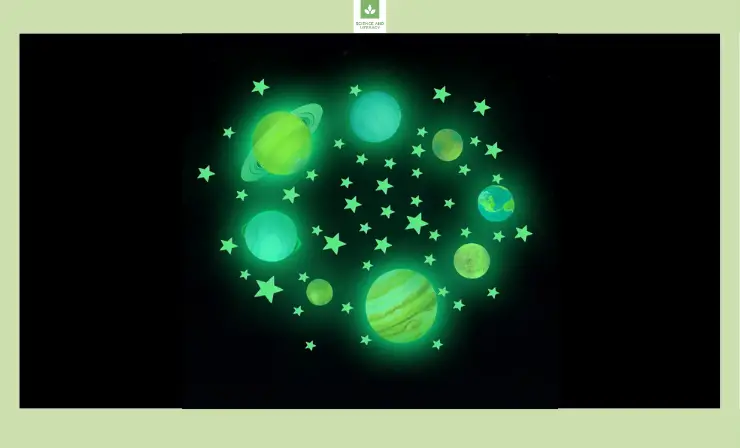
Materials Needed:
- Paper (preferably black)
- Glow-in-the-dark paint
- Paintbrushes
- Dark room for display
Steps:
- Begin by drawing the planets on your paper, using regular, vibrant paint as the base layer to accurately depict each planet’s unique colors and features.
- After the base layer dries, skillfully apply a layer of special glow-in-the-dark paint over each planet, carefully following their outlines to enhance their celestial appearance.
- Patiently allow all layers of paint to dry completely, ensuring the glow-in-the-dark effect is perfectly set and ready for the final reveal.
- Once the paint has thoroughly dried, dim the lights or turn them off completely, and gather around to observe and discuss the mesmerizing glowing solar system, focusing on each planet’s characteristics.
- Encourage each student to express their creativity by creating their own personalized glow-in-the-dark solar systems, using the learned techniques and their understanding of the planets.
Begin your glow-in-the-dark project with this video, showcasing how to use glow sticks for a stunning solar system model. It’s a visually captivating method, perfect for demonstrating celestial concepts in a fun and luminous way.
12. Edible Solar System
Bake an edible solar system with cookies representing the various planets, blending culinary skills with space exploration. This tasty project allows students to decorate cookies to resemble different planets, and then arrange them in order. It’s a delightful and educational activity, offering a sweet and memorable learning experience about the solar system.
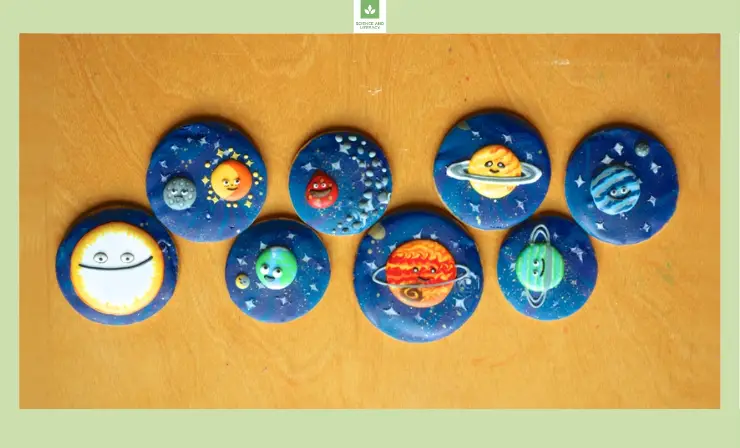
Materials Needed:
- Cookie dough
- Icing in various colors
- Baking sheets
- Oven
Steps:
- Begin by carefully preparing and baking a batch of cookies, ensuring they come in a variety of sizes to accurately represent the different planets in the solar system.
- Once the cookies have cooled down, skillfully use brightly colored icing to meticulously decorate each cookie, ensuring they resemble the distinct appearance of each planet in our solar system.
- Thoughtfully arrange the decorated cookies in a linear order, mirroring the solar system’s layout from the Sun outwards, to visually demonstrate the planets’ positions.
- Engage the students in a lively discussion about the unique features and interesting facts of each planet, using the cookies as visual aids to enhance their understanding.
- Finally, invite everyone to partake in eating the solar system, turning this delicious activity into a memorable, tactile reinforcement of the day’s astronomical learning experience.
This delicious video tutorial on making solar system cookies is a great way to integrate baking with learning. Students can see how to decorate cookies to represent different planets, combining culinary skills with space education.
13. Solar System Bottle Caps
Create an eco-friendly solar system model using painted bottle caps. This project encourages recycling and creativity, as students paint each cap to represent a different planet. Arranged on black paper, the caps form a simple yet effective solar system, providing a hands-on approach to learning about the planets and their characteristics.
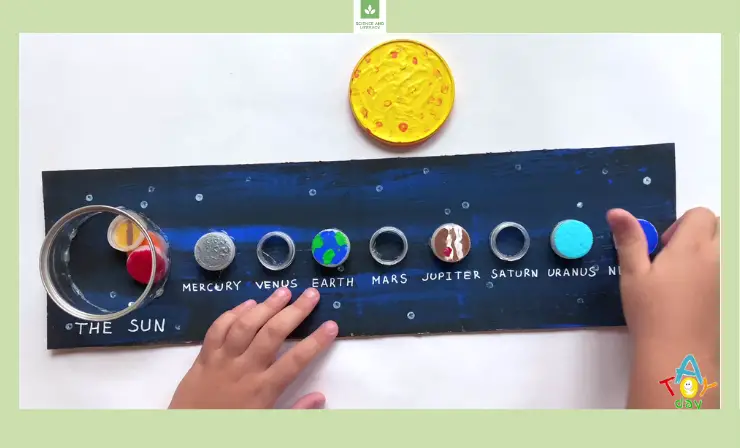
Materials Needed:
- Bottlecaps of various sizes
- Paint (various colors)
- Black paper or cardboard
Steps:
- Begin by diligently collecting a variety of bottle caps, ensuring they are thoroughly cleaned and free from any residues or labels.
- Carefully paint each individual bottle cap using a selection of colors, with each cap uniquely representing a different planet in our solar system.
- Thoughtfully arrange the painted bottle caps on a sheet of black paper, meticulously positioning them to accurately mimic the layout of the solar system.
- Utilize this innovative and tactile model as an engaging educational tool to discuss and explain the distinctive characteristics and intriguing features of each planet.
Introduce the bottle cap solar system project with this creative video. It demonstrates how to upcycle bottle caps into a unique solar system model, encouraging eco-friendly practices and creativity in visualizing the planetary arrangement. This resourceful project not only enriches the students’ understanding of the solar system but also instills values of recycling and innovation, fostering a sense of environmental responsibility and artistic expression.
14. Popsicle Sticks Solar System
Craft a unique solar system model using popsicle sticks and colored paper. This hands-on project allows students to cut out planet shapes and attach them to sticks, forming a visually appealing solar system. It’s a great way to engage students in creative learning, fostering an understanding of the solar system’s structure. This activity not only enhances their knowledge about the solar system but also develops their fine motor skills and creativity, making learning about astronomy both fun and educational.
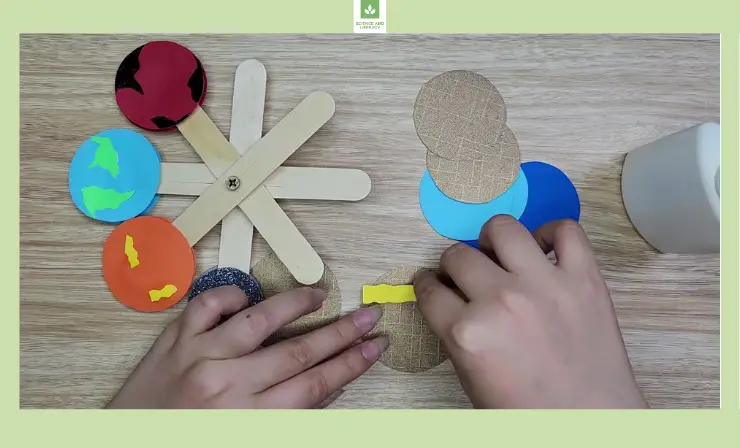
Materials Needed:
- Popsicle sticks
- Colored paper
- Scissors
- Glue
Steps:
- Cut out accurately sized planet shapes from various colored paper.
- Carefully glue each cut-out planet to an individual popsicle stick.
- Strategically connect the sticks in a circular pattern, centering around a larger, bright ‘Sun’ representation.
- As you assemble the model, engage in a detailed discussion about each planet’s unique attributes and position.
This video is an excellent start for creating a solar system with popsicle sticks. It offers practical guidance and encourages students to use simple materials to create a comprehensive model of our solar system. Watch the video to gain insights into the process and stimulate students’ creativity, helping them transform everyday popsicle sticks into an educational and visually appealing representation of the solar system.
15. Balloon Solar System
Transform your classroom into a visually striking representation of the solar system with colorful balloons. Inflate balloons of various sizes and colors to symbolize different planets, then hang them in order, creating a vibrant and engaging display. This interactive project fosters a deep understanding and appreciation of the solar system’s scale and diversity among students, enhancing their astronomical knowledge.
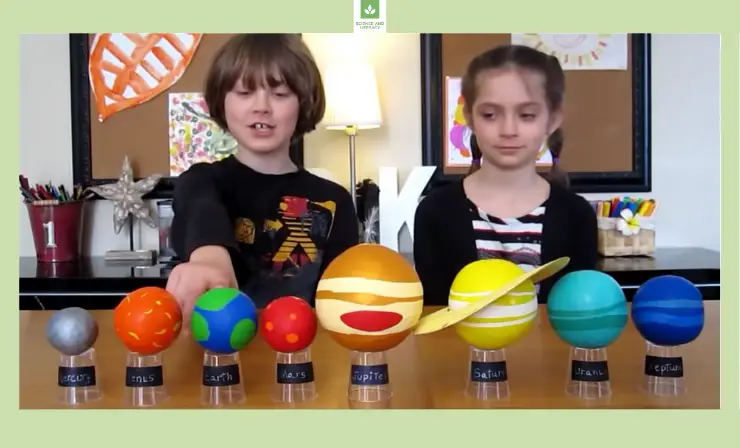
Materials Needed:
- A collection of balloons in different colors and sizes
- String for suspending the balloons
- Tape or hooks to hang the balloons
- A pump for inflating the balloons (optional)
Steps:
- Start by inflating balloons to sizes that correspond to the relative sizes of the planets. For instance, a larger balloon for Jupiter and a smaller one for Mars.
- Arrange the balloons in the order of the planets from the sun. Use string to suspend them from the ceiling or attach them to the wall.
- Employ tape or hooks to securely hang each balloon in its designated position.
- Enhance the learning experience by labeling each balloon with the name of the planet it represents.
- Use this balloon solar system as a dynamic educational tool to discuss each planet’s unique features, position, and role in the solar system.
- Encourage students to interact with the display, fostering a more engaging and memorable learning experience.
Kickstart your balloon solar system project with this fun video, showcasing a step-by-step guide to assembling a vivid, balloon-based model of the solar system. This resource is ideal for visual and tactile learners, offering an interactive and captivating method to explore the wonders of space in a classroom setting.
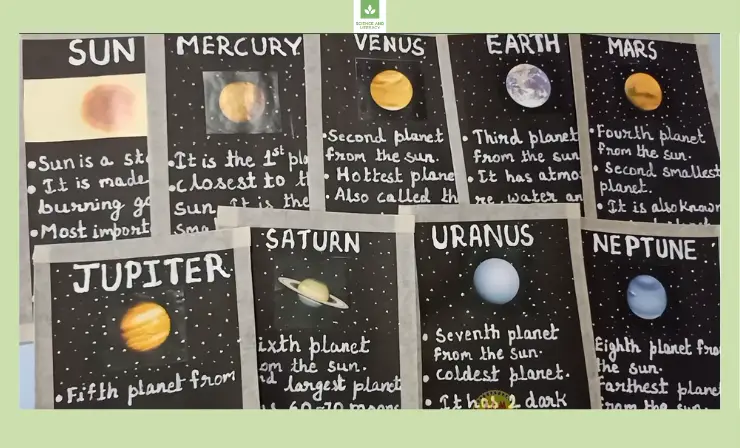
16. Solar System Flashcards
Engage students in a fun and educational journey through the solar system with custom-made flashcards. This activity not only bolsters their understanding of planetary features but also enhances memory and recognition skills.
Materials Needed:
- Cardstock or heavy paper
- Colored markers or paints
- Images of the planets
- Scissors
- Laminating sheets or contact paper (optional)
Steps:
- Start by cutting the cardstock into equal-sized rectangles, large enough to write on and illustrate.
- On one side of each card, write the name of a planet or celestial body. Include the Sun and perhaps a few interesting moons or asteroids.
- Use the colored markers or paints to draw each celestial body on the opposite side of the card. Alternatively, glue printed images for a more realistic look.
- Discuss key facts about each planet as you work, such as its size, color, position in the solar system, and any unique features.
- Optionally, laminate each card for durability. This makes them reusable and protects them from wear and tear.
- Mix up the cards and test students’ knowledge by having them match the name with the correct image, or quiz them on facts related to each celestial body.
Before diving into the flashcard-making activity, show this instructional video to the class. It’s a brilliant resource for visualizing the process, stimulating creativity, and aligning everyone’s approach. Watching the video also enhances understanding of effective flashcard design, encouraging students to create more impactful learning tools.
17. Phases Of The Moon
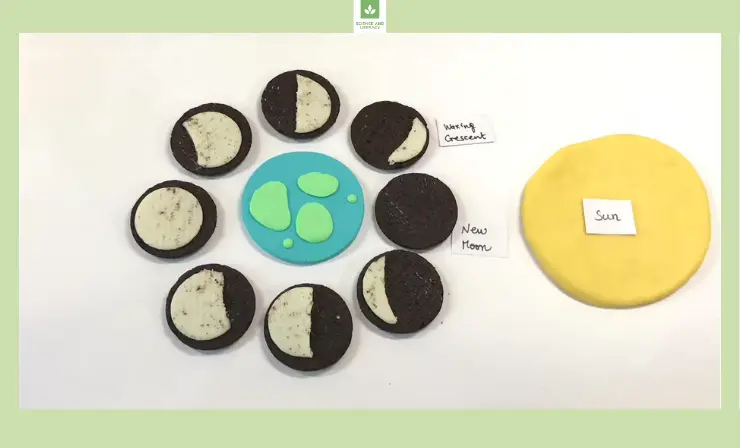
Discover the phases of the moon in a deliciously fun way using Oreos! This interactive experiment is a tasty method to teach students about the lunar cycle, engaging their senses and imagination.
Materials Needed:
- Oreo cookies (enough for each moon phase per student)
- White paper plates
- Plastic knives
- Napkins
Steps:
- Provide each student with a set of Oreos and a plastic knife.
- Place a paper plate in front of each student to arrange their Oreos.
- Begin by explaining each phase of the moon, starting with the New Moon and progressing to the Full Moon.
- For each phase, have students carefully twist their Oreos apart and use the knife to scrape the cream filling to match the shape of that lunar phase.
- As they create each phase, place the Oreos in order on the plate to represent the lunar cycle.
- Discuss how the moon’s appearance changes from Earth due to its position relative to the Earth and Sun.
- Once completed, review the lunar phases again, using the Oreos as a visual guide.
- End the lesson with a delightful twist – allow students to eat their Oreo moons, celebrating their new understanding of the lunar phases!
Begin the moon phases lesson with this engaging video. It beautifully illustrates how to use Oreos to model each lunar phase, making the concept tangible and fun. This introduction sets the tone, stimulates enthusiasm, and ensures students grasp the fundamental idea before they start their own delicious lunar exploration.
For a video showing you five other projects that you can use to teach the solar system to your students, check out A Toy Day’s YouTube video. It is a compilation of several projects that will keep children entertained for long periods of time.
I also recommend investing in an interactive whiteboard. These devices are perfect for different types of learners, and they bring so much fun to your classroom. You can play games while also teaching your students various topics. Consult this guide to determine the most suitable whiteboard for your needs.
Seeking additional ideas for science experiments? Dive into our exclusive article dedicated to this topic for a wealth of inspiration for kids of all ages.
How To Introduce Solar System To Students
You may find yourself wondering how to introduce the complex solar system to your students. Do not worry; I will help make this a much simpler process for you. First, I want to assure you that your students will enjoy learning about the various planets. Since the solar system consists of so many bright-colored planets that are of different shapes, each one is bound to grab their attention.
After you have gone over each planet, be sure to come up with ways to help students remember each one. You can develop worksheets that have the name of the planet and its color to help. Once you feel that your students comprehend all the planets, I believe you should do several fun projects to help them grasp them even more. Children do not do well with lectures for long periods of time, so integrating hands-on projects will lighten up their mood and create fun in your classroom.
Be sure to ask the students questions about the planets to ensure that they understand each one. For example, you may ask, “What color is Jupiter?” or hold up a sheet of paper with the Earth on it and ask, “What planet is this?”
To see a simple and fun solar system project for kids, check out Zodiac Bitavarra’s YouTube video. You will only need a few items that you can pick up from a craft shop, and it will bring you and your students hours of fun. This project is an excellent way to introduce the solar system to your students.
An awesome gadget that I believe every teacher should have in their classroom is a document camera. This camera can work virtually and in person. All you need to do is place an object underneath the camera, and your students will be able to see it on the screen.
Some Interesting Facts About The Solar System To Tell Students
Interesting facts are not just attention grabbers; they serve as powerful tools to engage your students, piquing their interest and prompting questions that lead to meaningful learning experiences.
To captivate your students with the wonders of the cosmos, consider sharing these fascinating facts about our solar system:
- You cannot stand on Uranus: Uranus is unique in the solar system as it rotates on its side, making it impossible to stand on it like we do on Earth.
- The rings on Saturn are mostly made of water: Saturn’s rings, a splendid sight in our solar system, are predominantly composed of countless small ice particles, reflecting sunlight and giving them a bright appearance.
- Mercury takes three months just to orbit the Sun: Mercury, the closest planet to the Sun, has a peculiar orbit. It takes about three Earth months to complete one orbit around the Sun, a stark contrast to Earth’s 365-day orbit.
- One day is longer than an entire year on Venus: Venus, often referred to as Earth’s sister planet, has an extremely slow rotation on its axis. In fact, a single day on Venus (one complete rotation) is longer than its year (one orbit around the Sun).
- It would take 100 times longer to make it around the Sun than it does the Earth: A journey around the Sun takes Earth 365 days, but if you were traveling on a comet from the outer reaches of the solar system, it could take more than 100 Earth years to complete the same journey.
- The solar system is over 4 billion years old: Our solar system, a vast and ancient celestial structure, is estimated to be over 4 billion years old, having formed from a giant, rotating cloud of gas and dust known as the solar nebula.
Integrating these intriguing facts into your lessons can turn a routine class into an extraordinary exploration of our solar system, encouraging your students to appreciate the vastness and complexity of the universe we inhabit.
If you would like to watch a video that goes over other science project ideas for children, take a look at The Best Project Maker’s YouTube video. This video is great at explaining several different projects that will keep your students engaged as well as teach them everything there is to know about science.
For older students who need to go back and look at your lessons on the solar system, my advice is to purchase a camera for recording lectures. With this tool, you can record your lecture and lesson plans, and your students who missed your class or simply need to go back and take notes for their exams can do so. I have written another article on these devices.
On the hunt for further inspiration for science experiments? Our comprehensive article offers a plethora of imaginative ideas to explore.
Useful Resources
- Science Lesson Plans for the Classroom
- How to Make Science Fun and Exciting in the Classroom
- How Can I Get My Child Interested In STEM?
Conclusion
I hope this article helped you find a few solar system project ideas that you would like to try out in your classroom. The goal is to encourage teachers around the globe to adopt these projects into their classrooms as they are great learning tools that will keep your students entertained for hours at a time. Good luck and happy teaching!
- 14 Science Experiments for Middle School — Unlock the Wonders of The World in Your Classroom - February 18, 2023
- Top 11 Sound and Voice Amplifier Apps: Enhance Audio on Your Device with the Best Volume Boosters - January 26, 2023
- 7 Creative Valentine’s Day Poster Ideas to Make Your Space Feel More Festive - January 11, 2023

Which class can these projects be used for?
I think they can be used for students of all ages. Of course, students will need help from their parents or they can do projects in pairs.