When I am continuously going over worksheets or books with my elementary class, I notice my students’ long and bored faces, their eyes drifting away from the material. Because of this observation, I try to integrate at least one hands-on science experiment into my weekly schedule. This approach not only keeps the children entertained, engaged, and focused but also fuels their innate curiosity. The objective is to spice things up every once in a while to keep my classroom fun and the learning experience vibrant.
The future is dependent on humans who know how to use science to make sound decisions, innovate, and take part in cultural, political, and civic conversations. Understanding this, I felt a responsibility. With that being said, I wanted to help other teachers around the world learn how to introduce science in fun, practical, and interactive ways for their elementary-aged students. Therefore, I am sharing my ultimate list of 16 science experiments for elementary school in this article.
This is how experiments are held at Northridge Elementary School:
WOW! The 5th graders at Northridge Elementary School participated in our lesson NEWTON’S 2nd LAW OF MOTION. Their experiments helped them understand force, mass, and acceleration. https://t.co/IRMc0iv6RJ pic.twitter.com/a93gleNPnL
— WPAFB EO Office (@wpafbeo) March 2, 2022
After reading this article, you will officially know:
- The ultimate list of best science experiments for elementary school→
- The benefits of doing science experiments in elementary school→
- The safety measures that should be implemented for elementary school students participating in science experiments→
Here are the 16 science experiments for elementary school students that I’ve chosen:
| Experiment | Details |
|---|---|
| 1. Make a Tornado in a Jar |
|
| 2. Create a Rain Cloud in a Jar |
|
| 3. Make a Volcano |
|
| 4. Make Slime |
|
| 5. Watch Crayons Melt to Form Art |
|
| 6. Make a Lava Lamp |
|
| 7. Create a Lemon Battery |
|
| 8. Make Ice Cream in a Ziplock Bag |
|
| 9. Make Your Pennies Shiny and Clean |
|
| 10. Make Your Lunch Bag Explode |
|
| 11. Blow Up a Balloon |
|
| 12. Turn Milk into Plastic |
|
| 13. Watch a Paperclip Float |
|
| 14. Fly Paper Airplanes |
|
| 15. Create an Elephant Toothpaste Fountain |
|
| 16. Write Secret Messages with Invisible Ink |
|
To my surprise, there are so many different science experiments to choose from with this age group. In fact, I have tried out probably over 50 this year alone. I watched my students’ impressions and interactions when it came to each, which led me to making this list of best experiments for elementary school. Below, I will list the top 16 experiments that I feel my class of elementary-aged students liked the best. If you are new to trying experiments with your students, I suggest starting with these first.
1. Make a Tornado in a Jar
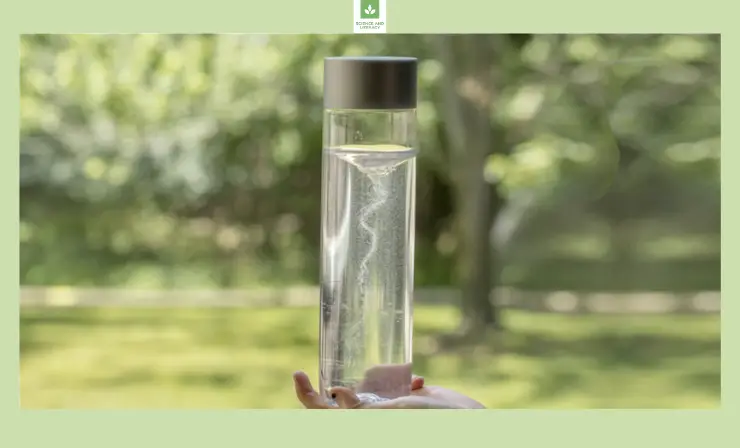
Unveil the mesmerizing beauty and force of a tornado right in your classroom with this hands-on experiment. This simple yet captivating demonstration not only brings science to life but also encourages students to question, investigate, and explore the world around them. Through such interactive activities, young minds gain a deeper appreciation for the wonders of nature, the principles underlying them, and the dynamics of atmospheric phenomena.
Materials needed:
- Empty jar or bottle
- Fresh water
- A drop of dish soap
- Vibrant glitter
Steps:
- Begin by ensuring your jar or bottle is clean and free from residues.
- Carefully pour water until it reaches the ¾ mark of the jar.
- Introduce a drop of dish soap. This aids in mimicking the tornado’s signature swirl.
- Sprinkle a teaspoon of glitter. This simulates the debris and adds a touch of visual flair to your tornado.
- Secure the lid tightly. Give the jar a firm, circular swirl, then watch in awe as a miniature tornado springs to life!
Before starting, play LAB 360’s YouTube video for the class. It’s a fantastic way to provide context, excite students, and ensure everyone is on the same page. Additionally, discussing the science behind tornado formation deepens understanding and sparks further inquiries.
2. Create a Rain Cloud in a Jar
Experience the magic of meteorology with the ‘Cloud in a Jar’ experiment! Designed to mimic the natural phenomena of cloud formation and precipitation, this engaging demonstration offers students an up-close look at how rain is formed. By re-creating this atmospheric event in a controlled setting, educators can provide students with tangible evidence of the water cycle in action.
Materials needed:
- Water
- Shaving cream
- Food coloring (preferably blue to represent rain)
- Dropper or pipette
- Clear jar or transparent container
Steps:
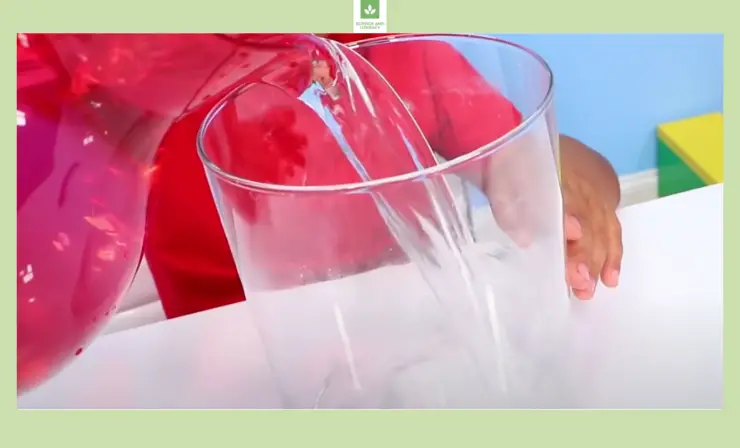
1. Begin by filling your clear jar about two-thirds full with water. This will represent the atmosphere.
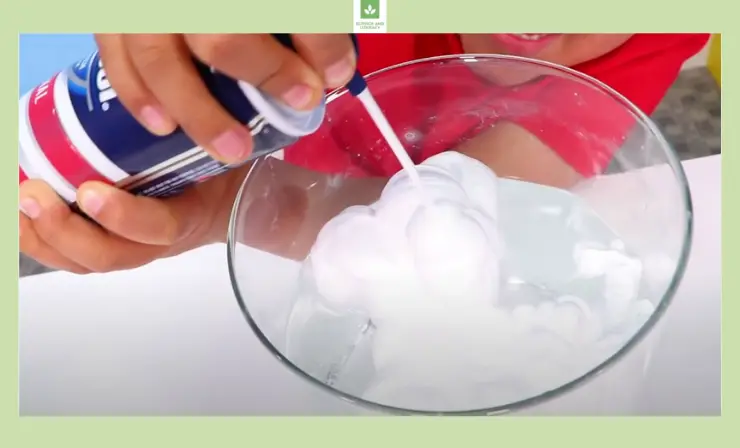
2. Gently add a generous layer of shaving cream on top, allowing it to float on the water’s surface. This will act as our cloud.
3. Briefly discuss with the students how clouds are formed from tiny water droplets that cling to dust particles in the atmosphere.
4. Using the dropper, carefully add drops of food coloring onto the shaving cream. These represent water droplets accumulating in the cloud.
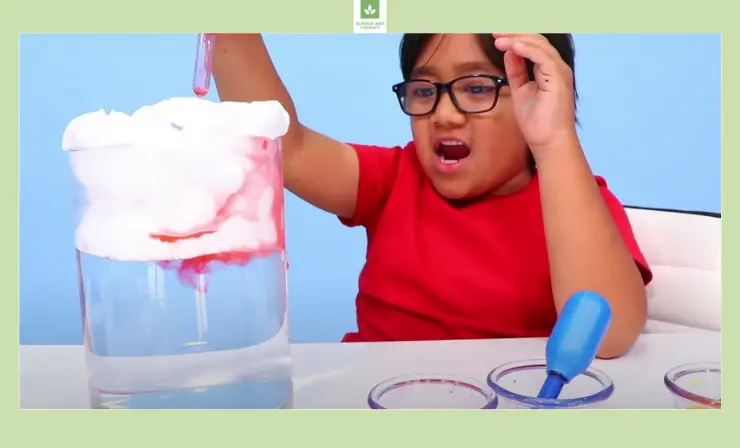
5. As the ‘cloud’ becomes saturated with the ‘water droplets,’ the food coloring will start to seep through the shaving cream, mimicking rainfall.
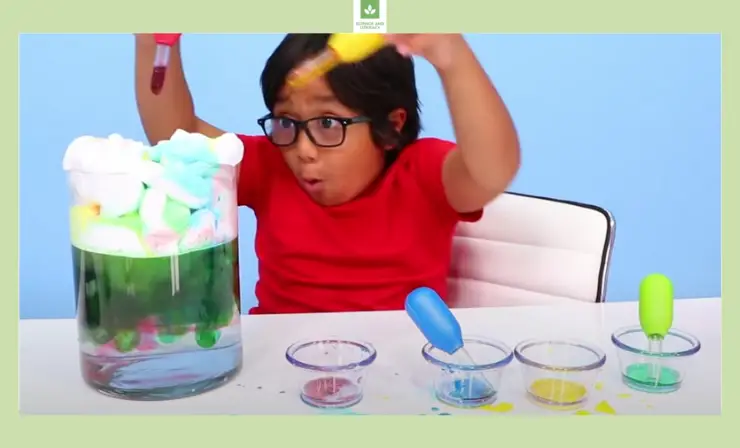
6. Observe and discuss the ‘rain’ falling into the ‘atmosphere’ below, drawing parallels to real-world rain events.
Engage, educate, and inspire your students with this fun and informative science experiment!
3. Make a Volcano
Experience the explosive power of a volcano right within the confines of your classroom! This classic yet enthralling experiment offers students a firsthand glimpse into the chemical reactions that mimic the natural phenomena of volcanic eruptions. It’s an excellent way to combine hands-on learning with theoretical knowledge, making science both accessible and fun.
Materials needed:
- Vinegar
- Baking soda
- Plastic Cup
- Beakers
- Orange food coloring (or red and yellow mixed together)
- Plastic tray or dish
- A spoon (for stirring)
Steps:
1. Pour baking soda about halfway into a beaker using a spoon to ensure an even distribution.
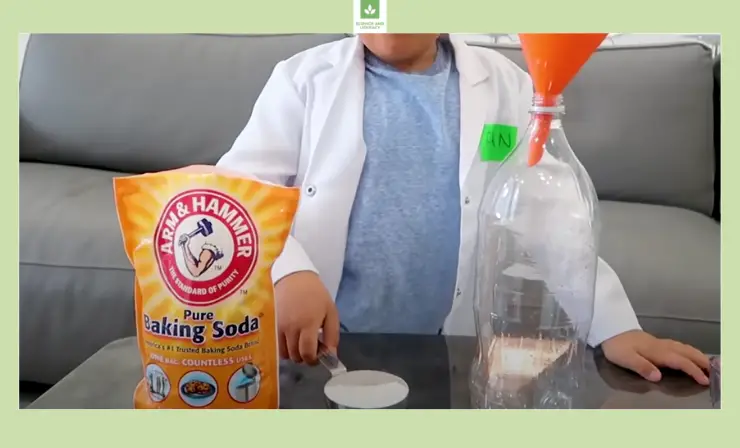
2. In a separate plastic cup, pour in vinegar.
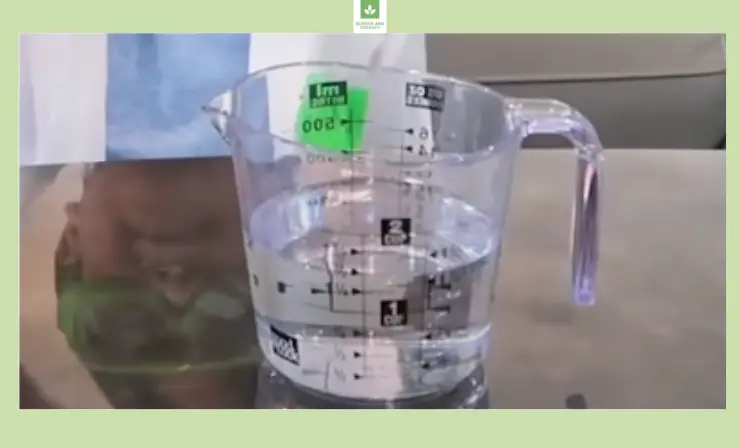
3. Add a few drops of the food coloring into the vinegar and stir until you achieve a vibrant orange hue. This represents the lava.
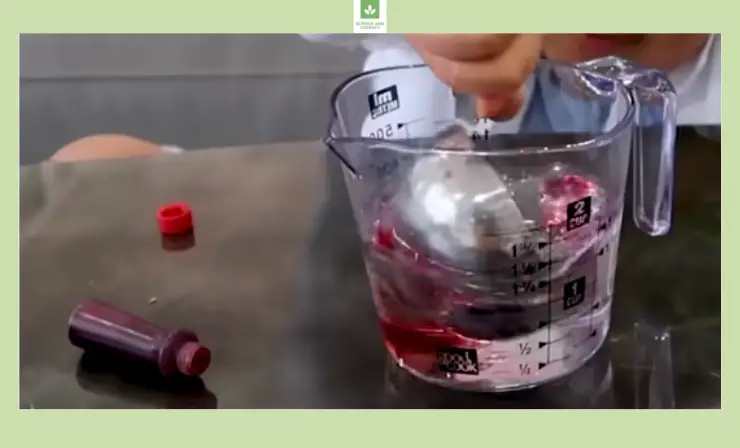
4. Carefully place the beaker onto the center of the plastic tray. This step ensures any overflow from the eruption is contained, making cleanup a breeze.
5. Slowly pour the orange vinegar mixture into the beakers filled with baking soda.
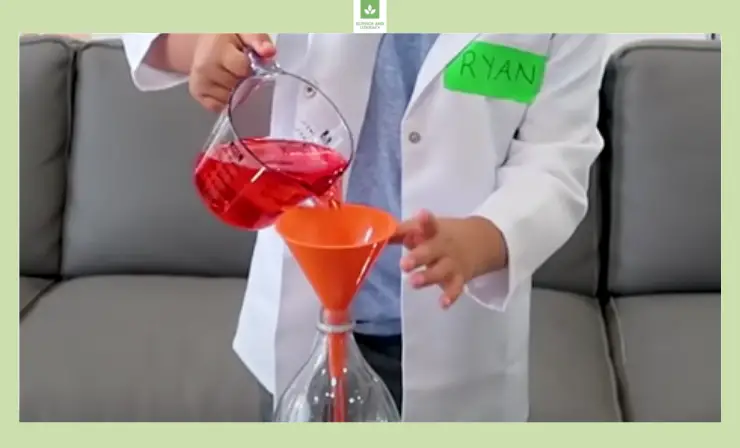
6. Stand back and marvel as the reaction between baking soda and vinegar creates a bubbly, frothy eruption reminiscent of a real volcanic outburst!
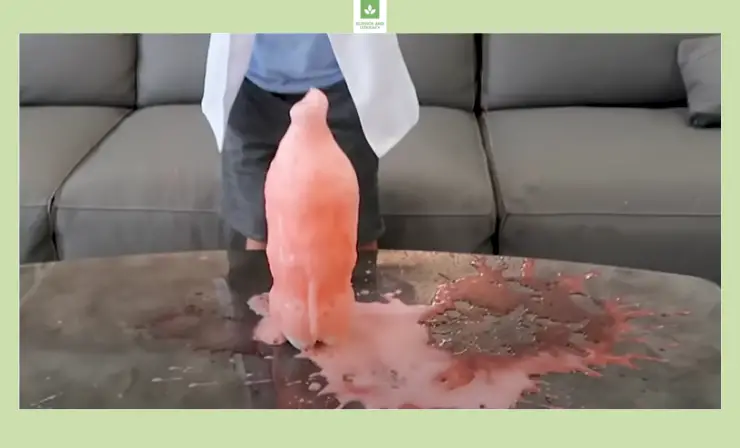
Through this engaging activity, students not only observe but also understand the underlying chemical reactions at play.
4. Make Slime
Unleash a world of creativity and tactile fun with the fascinating process of making vibrant, glittery slime! This captivating experiment is not only an excellent sensory activity but also introduces students to the wonders of chemistry, right in the classroom. As the ingredients come together, students can witness the transformation of simple household items into something entirely new, sparking their curiosity and fostering a love for hands-on learning.
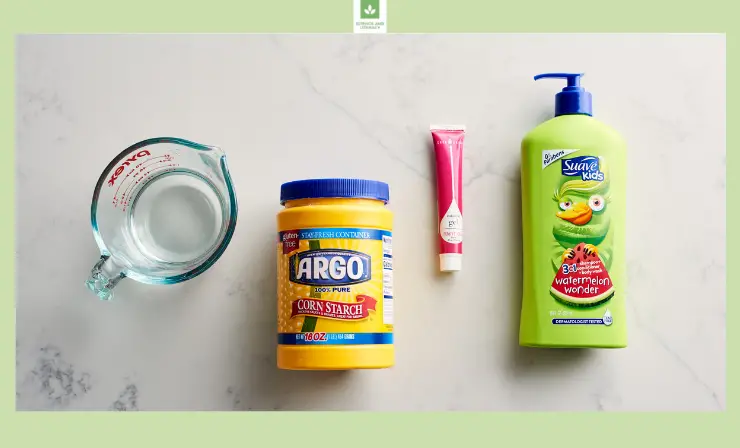
Materials needed:
- 2 bottles of school glue
- Liquid watercolors (colors of the student’s choice)
- Glitter
- 1 cup of liquid starch
- A large mixing bowl or container
- A stirring stick or spatula
Steps:
- Begin by pouring both bottles of school glue into your large mixing bowl or container.
- Generously sprinkle in your chosen glitter, ensuring it spreads evenly for that magical touch.
- Introduce the liquid watercolors, adding as many or as few drops as desired, to achieve the perfect hue.
- Gradually pour in the liquid starch, stirring continuously to ensure an even consistency.
- Once the mixture begins to come together, instruct students to knead it with their hands, refining its texture and blending the ingredients.
- After achieving the desired consistency, it’s time to dive in and play with your mesmerizing, glittering slime!
This delightful experiment combines creativity, science, and sensory exploration, promising hours of educational entertainment. Watch the video below for a clearer understanding of the slime-making process.
5. Watch Crayons Melt to Form Art
Experience the vibrant artistry of melted crayons and witness the creation of unique, sun-fueled masterpieces! This innovative activity not only demonstrates the effects of heat on wax but also encourages students to channel their inner artists, merging science and creativity. As the sun’s rays heat the crayons, they melt and blend, forming mesmerizing patterns and images that captivate young minds.
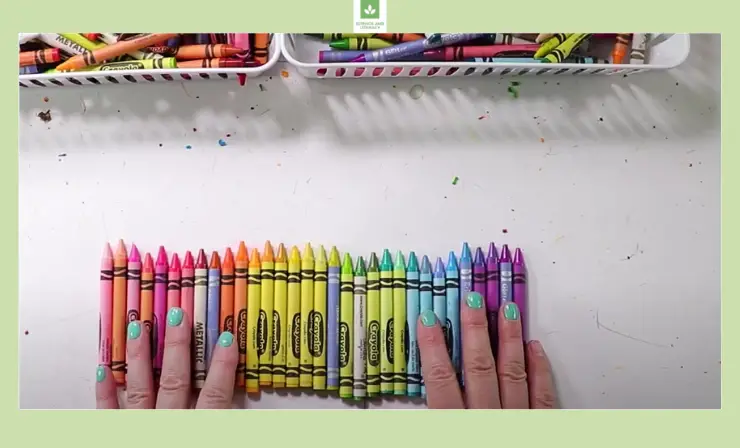
Materials needed:
- A variety of crayons (preferably without wrappers)
- Cardboard box
- Aluminum foil
- Pieces of cardboard (can be cut from the box itself)
Steps:
- Lay out the cardboard box in a flat area where it will receive direct sunlight.
- Carefully line a section of the cardboard box with aluminum foil, ensuring it’s smooth and without wrinkles.
- Place individual pieces of cardboard inside the aluminum foil-lined box. These will serve as the canvas for the melted crayon art.
- Instruct students to arrange their chosen crayons on the cardboard pieces in desired patterns or designs.
- Once the crayons are set in place, position the box under direct sunlight.
- After about 20 minutes (times may vary based on sun intensity), revisit the box to discover the transformed crayons. The once solid crayons should now be melted, creating vibrant, painting-like images.
This activity offers a delightful fusion of art and science, teaching students about heat’s effect on materials while sparking their creativity. Additionally, take a look at this video tutorial on creating melted crayon art.
6. Make a Lava Lamp
Discover the magic of density and chemical reactions by creating a mesmerizing lava lamp right in your classroom! This experiment brilliantly combines art and science, demonstrating to students how certain liquids don’t mix and how reactions can propel objects through a liquid. As the Alka-Seltzer reacts, it creates bubbles that move through the oil, beautifully illuminating the principles of buoyancy and density in a fun and interactive way.
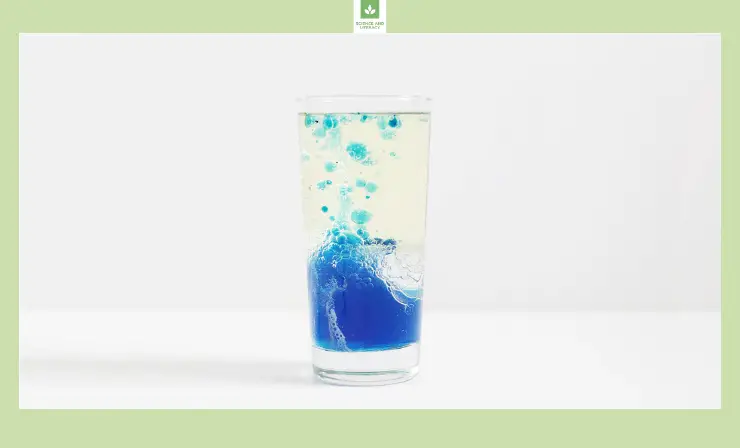
Materials needed:
- An empty clear bottle (preferably with a tight-sealing lid)
- Water
- Oil (vegetable or mineral oil works best)
- Food coloring of choice
- Alka-Seltzer tablets
Steps:
- Begin by pouring water into the empty bottle until it’s about 1/3 full.
- Carefully pour oil into the bottle until it’s nearly full, leaving a little space at the top.
- Add several drops of your chosen food coloring. Watch as the droplets sink through the oil and mix with the water below.
- Break an Alka-Seltzer tablet into several smaller pieces.
- Drop one of the Alka-Seltzer pieces into the bottle.
- Observe the magic! As the tablet reacts with the water, it produces gas bubbles that rise and fall in the oil, creating the mesmerizing effect of a lava lamp.
This experiment offers students a visually engaging way to understand some fundamental scientific concepts, making learning both entertaining and informative. Also, watch the following video tutorial on crafting your own lava lamp for a better understanding of the experiment.
7. Create a Lemon Battery
Introduce your students to the fascinating world of electricity with an experiment that taps into nature’s very own battery – the lemon! Lemons, when combined with metals like zinc and copper, create a chemical reaction that produces electricity. The energy harnessed from multiple lemons can even light up an LED bulb, providing a hands-on demonstration of how basic chemical reactions can be transformed into electrical energy. This experiment not only illuminates the science behind batteries but also instills an appreciation for alternative energy sources.
Materials needed:
- 1 LED bulb
- 4 fresh lemons
- 4 zinc nails
- 4 pieces of copper wire (short lengths)
- 6 alligator clips
- Protective goggles and gloves (for safety)
Steps:
1. Gently roll the lemons on a table to prime them, ensuring they’re juicier.
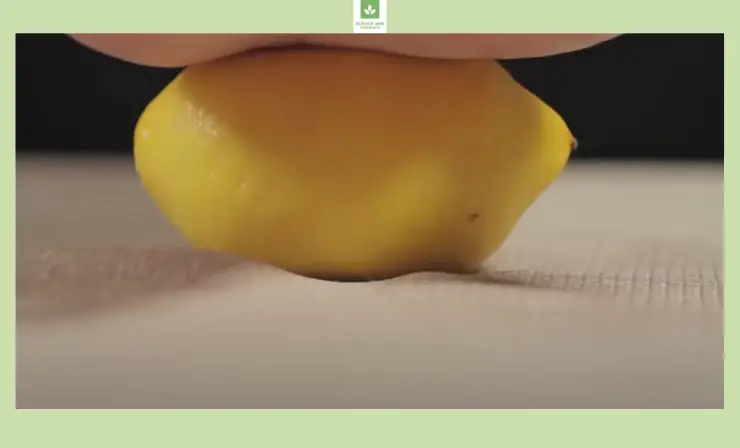
2. Carefully insert one zinc nail and one piece of copper wire into each lemon, ensuring they don’t touch.
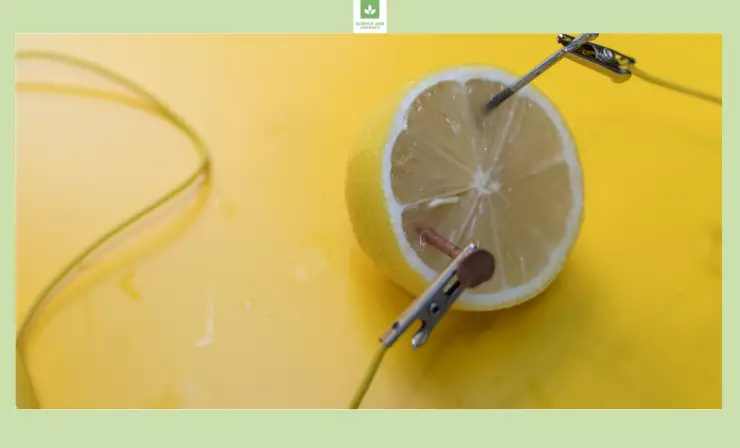
3. Use the alligator clips to connect the copper wire of one lemon to the zinc nail of the next, creating a chain.
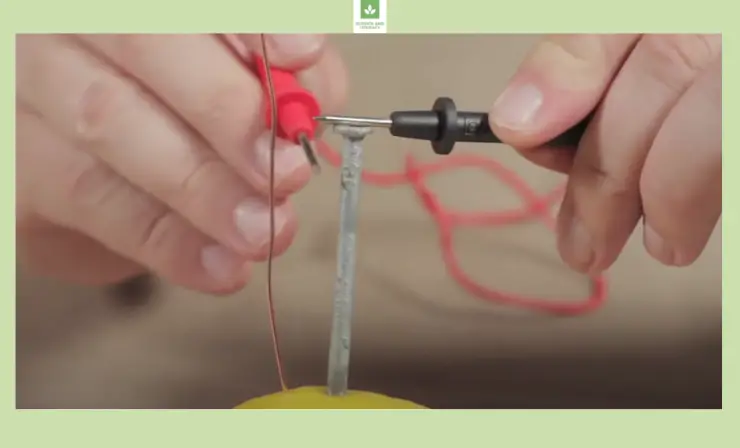
4. Connect one end of the chain (zinc nail) and the other end (copper wire) to the LED bulb using two separate alligator clips.
5. Observe the LED bulb. If connected correctly, it should light up, demonstrating the power of lemon batteries!
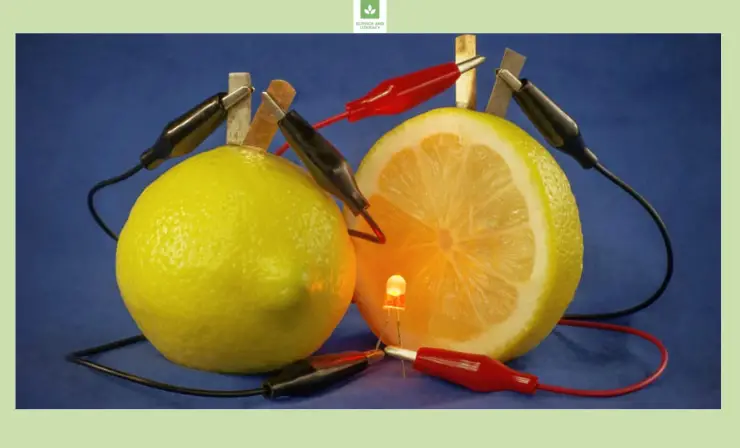
Another fun science experiment that involves lemons is the one where you can show your students the power of the lemon. This experiment shows that lemons react with metal, which young students will find very interesting. For an up-close look at this, check out LAB 360’s YouTube video.
8. Make Ice Cream in a Ziplock Bag
Discover the joys of making a tasty treat while learning the science behind freezing points with this exciting classroom experiment. This ice cream-making activity is not just fun for elementary students, but it also introduces them to the concept of how salt affects the freezing point of water. By the end of this experiment, students will not only have a basic understanding of the science involved but will also get to enjoy their very own homemade ice cream.
Materials needed:
- 1 large zip-lock freezer bag
- 1 small zip-lock freezer bag
- 4 oz of fresh milk
- 4 oz of cream
- 1/4 teaspoon of vanilla extract
- 4 teaspoons of sugar
- Ice cubes
- 1/2 cup of table salt
Steps:
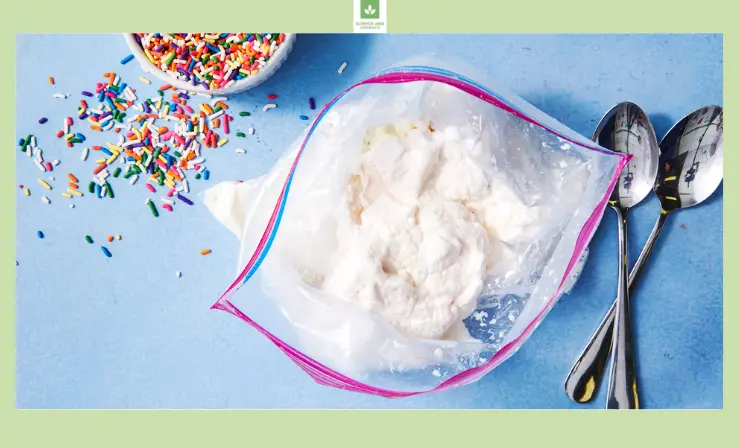
- Begin by mixing the milk, vanilla, sugar, and cream in the small zip-lock bag. Ensure it’s sealed tight.
- Fill the large zip-lock bag about halfway with ice cubes.
- Evenly spread the table salt over the ice.
- Place the small bag containing the milk mixture into the large bag filled with ice.
- Add more ice and sprinkle the rest of the salt on top.
- Seal the large bag securely and shake vigorously for 5-8 minutes.
- Carefully remove the small bag from the ice bag.
- Wipe the salt from the small bag, open it up, and enjoy the delicious ice cream you’ve made!
By combining simple ingredients and a bit of science, you’ve just made a delightful treat that showcases the wonders of chemistry in a delicious way! Watch this video tutorial for crafting homemade ice cream using a ziplock bag.
9. Make Your Pennies Shiny and Clean
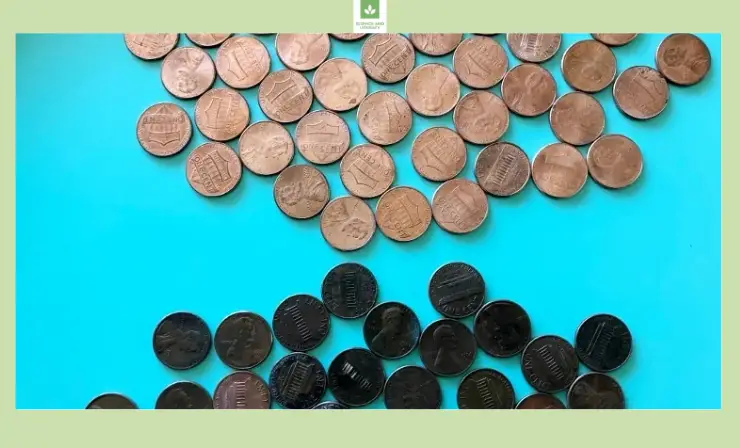
Unearth the dazzling brightness of old pennies with this enlightening experiment perfect for elementary students. By delving into the world of chemical reactions, this activity provides a tangible demonstration of how certain substances can interact with metals to produce fascinating results.
Materials needed:
- Pennies (preferably old and tarnished)
- 1/4 cup of vinegar
- 1 teaspoon of salt
- A non-metal bowl
- Paper towels
Steps:
- In your non-metal bowl, combine the vinegar and salt, stirring until the salt dissolves completely.
- Gently place a few tarnished pennies into the solution, ensuring they are fully submerged.
- Allow the pennies to sit in the solution for about 5 minutes.
- Carefully remove the pennies from the solution and rinse them under cold water.
- Pat the pennies dry using the paper towels and observe the noticeable shine that has returned to them.
- Discuss with the students how the combination of vinegar (an acid) and salt effectively removes the layer of copper oxide, restoring the penny’s original luster.
Engage students with this fun and educational activity, encouraging them to ask questions and explore the science behind it. Witnessing the transformation of tarnished pennies back to their original brilliance provides a visual treat, illustrating the power of simple chemistry in action. Here’s also a video tutorial on this experiment.
10. Make Your Lunch Bag Explode
Discover the explosive power of a simple chemical reaction with this thrilling and educational experiment designed especially for curious elementary students. By skillfully combining basic household ingredients, students will gain firsthand experience observing the gaseous byproduct of an acid-base reaction and its dynamic ability to create pressure in a closed system.
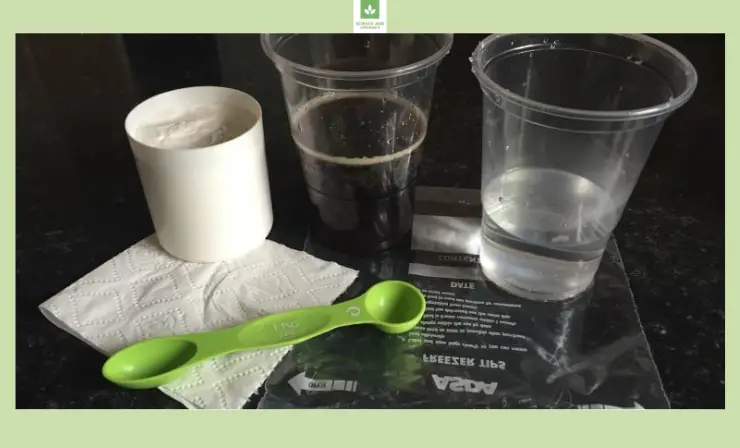
Materials needed:
- Small zip-lock bag
- Baking soda
- Vinegar
- Warm water
- Measuring cup
- Tissue
Steps:
- Begin by carefully pouring ¼ cup of warm water into the zip-lock bag.
- Next, add ½ cup of vinegar into the same bag.
- In a separate area, measure out 3 teaspoons of baking soda onto the tissue.
- Carefully fold the tissue, enclosing the baking soda within.
- Partially zip the plastic bag, leaving enough space to insert the wrapped baking soda.
- Quickly place the tissue with baking soda into the bag and seal it shut immediately.
- For utmost safety, place the bag either in a sink or outside on a flat surface, ensuring everyone stands back.
- Eagerly observe the bag as it expands, filling with gas, until it dramatically pops!
This engaging experiment not only dazzles with its unexpected finale but also underlines the importance of safety precautions and understanding chemical reactions in an unforgettable way. Take a look at the following video to gain a clearer understanding.
11. Blow Up a Balloon
Embark on a captivating journey of microbial activity with this simple, yet informative, elementary school experiment. By utilizing common ingredients found in most kitchens, young students can witness firsthand the fascinating process of fermentation, giving them a glimpse into the world of microorganisms and their role in producing gas.

Materials needed:
- Packet of yeast
- Plastic bottle
- 1 teaspoon of sugar
- Warm water
- Small balloon
Steps:
- Start by pouring approximately 1 inch of warm water into the plastic bottle.
- Carefully add the entire packet of yeast to the water, gently swirling the bottle a few times to mix.
- Incorporate the sugar into the bottle, swirling again to ensure even distribution.
- To prepare the balloon, blow it up and release the air a couple of times, stretching it out.
- Securely place the mouth of the balloon over the top of the bottle, ensuring a snug fit.
- Identify a warm location and let the bottle sit undisturbed for roughly 20 minutes.
- Return to observe the transformation, noting the inflated balloon as a testament to the yeast’s activity.
This experiment serves as a remarkable introduction to the wonders of biology, illustrating the unseen power of yeast and its ability to convert sugars into carbon dioxide gas.
To see other cool balloon experiments to do with young students, take a look at LAB 360’s YouTube video. This video shows you 16 different experiments, which your students are sure to love.
12. Turn Milk into Plastic
Unearth the fascinating world of chemistry by transforming everyday milk into plastic right before your very eyes. This experiment offers students a hands-on experience in witnessing how common substances can change forms under specific conditions, while also learning about casein found in milk.
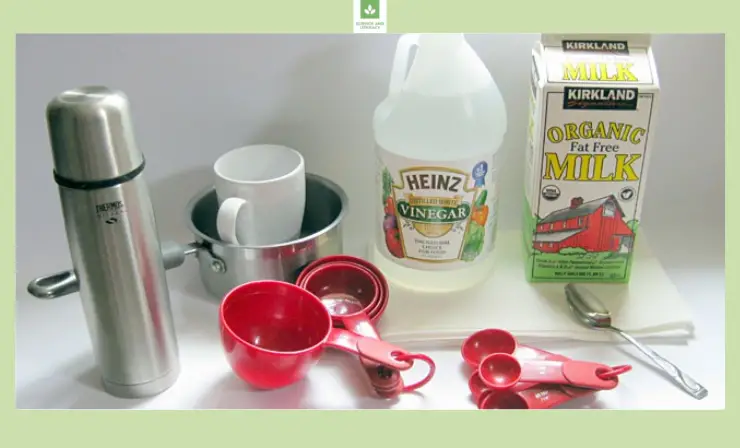
Materials needed:
- 1 cup of milk
- 4 teaspoons of white vinegar
- Strainer
- Bowl
Steps:
- The teacher should carefully heat the milk until it’s hot but ensure it doesn’t reach boiling point.
- Once heated, pour the milk into a bowl.
- Gradually add the white vinegar to the bowl, stirring the mixture continuously.
- With the teacher’s guidance, pour the milk through a strainer into the sink. Students will observe the formation of solid, lumpy globs.
- Allow the separated lumpy milk solids in the strainer to cool down for a short duration.
- Gently rinse these formed solids under water, ensuring all the residual vinegar is washed away.
- Now comes the fun part! Encourage students to press the pieces together, molding them into any shape they desire.
- Set aside the molded milk plastic and revisit it after a few days; it will have solidified completely.
This experiment beautifully showcases the separation of casein from milk, offering a fun and educational insight into the wonders of chemistry. Take a look at this video to gain a clearer insight into the concept.
13. Watch a Paperclip Float
Discover the wonders of water tension with this simple yet intriguing experiment that makes a solid paperclip float on water. While it may seem like magic to young minds, it’s actually science at work! Dive into the world of surface tension and challenge what seems to be the impossible.
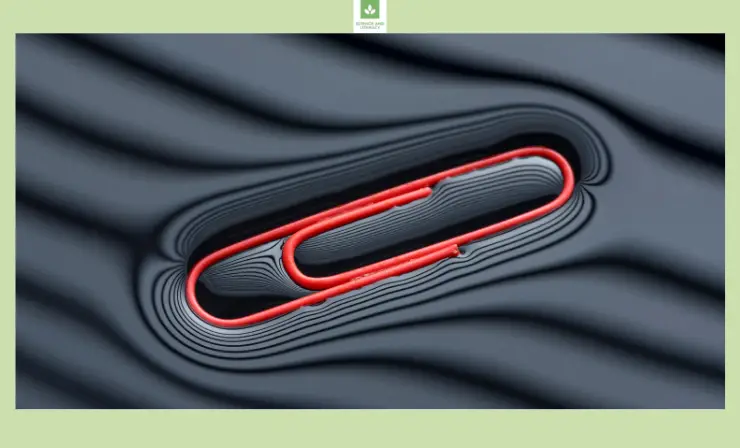
Materials needed:
- Paperclips
- Tissue paper
- Pencil with an eraser
- Bowl of water
Steps:
- Begin by filling your bowl with water.
- Test your observation skills: Drop a paperclip into the water. Notice it sinks immediately.
- Retrieve the paperclip and set it aside for now.
- Tear a small piece of tissue paper and delicately place it onto the water’s surface. Ensure it doesn’t submerge.
- Now, ever so gently, position the paperclip on top of the floating tissue paper.
- With precision, use the eraser end of the pencil to prod the tissue paper. Your goal is to sink the tissue without disturbing the paperclip.
- As the tissue paper submerges, a delightful surprise awaits: the paperclip remains floating atop the water!
This experiment is a delightful introduction to the concept of surface tension, illustrating how certain lightweight objects can float on water when conditions are just right.
For more science experiments that involve water, watch LAB 360’s YouTube video that shows you several neat experiments dealing with water. This video is perfect for students who are water lovers.
14. Fly Paper Airplanes
Embark on an aerodynamic adventure with your students by diving into the world of paper airplanes. This fun and educational activity not only offers a hands-on experience but also introduces the basic principles of flight. Through this, students can appreciate the balance of forces that enable objects to soar in the sky.

Materials needed:
- Paper (preferably A4 or letter size)
- Tape Measure
Steps:
- Begin by demonstrating various methods of folding paper airplanes. Ensure to show diverse designs to highlight the differences in their flights.
- Allow students ample time to craft their own airplanes, encouraging them to be creative with their designs.
- Designate a starting line from where each student will launch their airplane.
- As students throw their planes, observe the flight patterns and distances.
- Using the tape measure, accurately measure how far each airplane traveled from the starting line.
- Gather the students and discuss the four primary forces acting on their planes:
- Weight (gravity pulling the plane down)
- Lift (opposing weight, helping the plane rise)
- Thrust (the force propelling the plane forward)
- Drag (air resistance working against thrust, slowing it down)
Observing the impact of design on distance and stability will instill a practical understanding of aerodynamics, making learning both fun and informative. Also, check out this video for a step-by-step tutorial on crafting a basic paper airplane.
15. Create an Elephant Toothpaste Fountain
This exuberant chemical reaction produces an overflowing foam, demonstrating exothermic reactions and the rapid expansion of gases, captivating students with chemistry’s excitement.
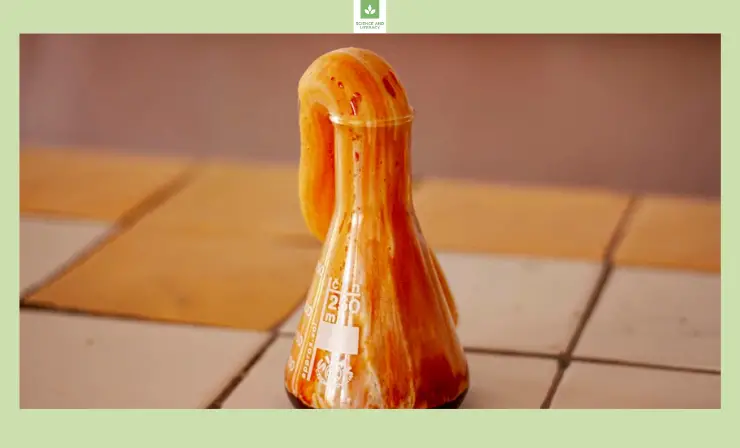
Materials needed:
- Hydrogen peroxide solution (6% or 20-volume for a safer version, higher concentrations for more dramatic results)
- Liquid dish soap
- Food coloring (optional, for visual effect)
- Dry yeast
- Warm water
- Small cup or container
- Safety goggles
- Tray to catch the foam
- Large cylinder or flask
Steps:
- First, put on safety goggles and place the cylinder on the tray to catch any overflow.
- Pour about half a cup of hydrogen peroxide into the cylinder. This is our reaction substance.
- Add a squirt of dish soap into the cylinder and, if desired, a few drops of food coloring. Stir gently to mix.
- In a separate small cup, combine one tablespoon of dry yeast with about three tablespoons of warm water. Wait a few minutes for the yeast to activate.
- Guide the students through a brief explanation of how yeast acts as a catalyst in this reaction, speeding up the breakdown of hydrogen peroxide into water and oxygen gas.
- Pour the yeast mixture into the cylinder with the hydrogen peroxide and watch as the mixture foams up and oozes out like toothpaste being squeezed from a giant tube.
- Discuss the warmth felt on the cylinder, linking it to the exothermic reaction taking place.
For a deeper insight, watch this video which displays various complexity levels of the experiment.
16. Write Secret Messages with Invisible Ink
Delve into the world of espionage and mystery with the ‘Invisible Ink’ experiment! This simple yet fascinating activity allows students to understand chemical reactions and the idea of acids and bases. With this experiment, educators can provide a hands-on learning experience about how certain substances can be used to create and reveal hidden messages.
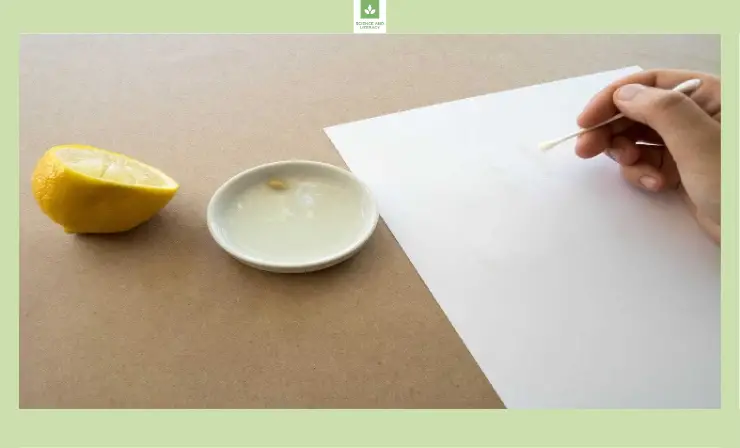
Materials needed:
- Lemon juice (or any citrus-based juice)
- Q-tips or small paintbrushes
- White paper
- Heat source (such as a lamp with an incandescent bulb, iron, or hairdryer)
Steps:
- Start by squeezing lemon juice into a bowl or cup.
- Dip a Q-tip or small paintbrush into the lemon juice and use it to write a message on the white paper. The lemon juice will be nearly invisible as it dries.
- Allow the message to dry completely, becoming invisible to the naked eye.
- While the message dries, engage the students in a discussion about how acids like lemon juice weaken paper fibers and how they can be revealed through oxidation.
- Once the message is dry, hold the paper near a heat source carefully. As the paper heats up, the message will start to appear due to the oxidizing process, where the weakened fibers darken before the rest of the paper.
- Observe the secret message emerging and discuss how historical figures might have used similar methods to send secret communications.
Also, watch this accompanying video on the invisible ink experiment to see the mysterious messages come to life. It will enhance your understanding of the chemistry behind this intriguing process.
An easy science experiment to consider doing with your students is the bouncy egg experiment. I did not mention this experiment in my list, but it is worth taking the time to do. LAB 360 has a short YouTube video showing how to make bouncy eggs, which you should check out. Your students will get a kick out of this!
After you have completed a science experiment with your students, you should use an interactive whiteboard to go over everything that they learned. Some students may have had a different experience than others that they would like to share. To find a top interactive whiteboard for your classroom, check out my article on the 10 best interactive whiteboards by clicking here. I promise that you will find one that will be the most effective for your students’ needs.
5 Benefits of Science Experiments at Elementary School:

You may think that elementary-aged children will make a mess, may not fully understand, or simply cannot handle a science experiment. However, this is not the case. Children at a young age comprehend a lot more than you think, and there are many positive benefits to doing science experiments starting in elementary school. I will tell you about a few of the benefits below.
1. Children tend to do best when they are actively involved in learning
Children need to be able to ask questions, participate in interesting discussions, and tell you about their interests. When they are actively involved in learning, their brains are grasping so much more information than when not.
2. Children’s senses should be stimulated
The five senses are smell, hearing, taste, feel, and see. Therefore, children need to stimulate these senses to learn. Science experiments are great ways to engage all five senses!

3. Hands-on activities are best for young children
Most children do not learn only by seeing; they learn by doing. By being able to actually do the activity, they are able to fully observe what is happening, ask you questions, and experiment to see what will occur.

4. Young students should be allowed to be curious and discover science themselves
It is important for young students to be allowed to let their curiosity soar and make discoveries themselves. If they discover something themselves, they are more likely to remember it.
5. Critical thinking skills are developed when students participate in science experiments
Critical thinking skills are important in everyone’s lives. That is why you should encourage young children to develop critical thinking skills. Science experiments are an excellent way to do this because the children are able to ask you questions as well as find the answers to the questions that they had for themselves.
For more science projects, check out our article with easy experiments for kids of all ages. Also, to see an up-close look at 10 science projects for elementary school students, watch LAB 360’s YouTube video. The video shows how to carry out each science project which will benefit you in knowing exactly how to do them.
If you have heard the term Special Day School teacher or SDS teacher and would like to know more about what that is, I recommend checking out my other article on this subject by clicking here. A SDS teacher is very important in the classroom and one of the best parts about their job may be to bring fun-filled activities for the students to participate in such as science experiments and hands-on learning experiences.
Safety Measures for Elementary School Students
It is crucial to have certain safety measures in place when doing science experiments with elementary school students. Everyone can experience an accident when doing an experiment, but young children are more prone to accidents than other groups. This does not mean that you should not do science experiments with this age group; it just means that you should take extra precautions. You can even make the safety measures a routine with your students, which will ensure that they always know what to do to prepare for their upcoming science experiment.
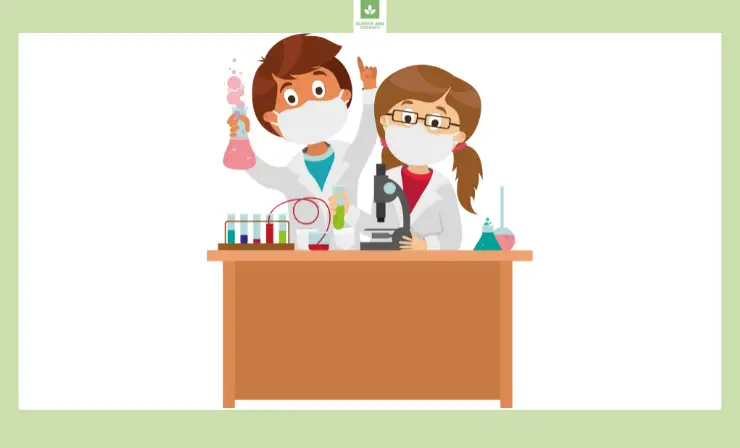
The following are safety measures for elementary school students participating in science experiments:
- Put on your goggles, coat, and gloves: Your students should have their own sets of goggles, coats, and gloves. These items should be put on before beginning the science experiment to ensure protection. Make sure that everything fits each child perfectly.
- As the teacher, be sure to check chemicals in the science experiment before allowing the children to participate: A lot of experiments do call for household chemicals. Make sure that you read all labels of the products that you are planning to use beforehand. Ensure that there are no hazards and be sure to tell the students not to put any chemicals near their mouth or eyes. Properly dispose of all chemicals after you are done using them.
- Be sure to keep sharp tools out of reach and help the children if they must use them: Try your best not to use any glass. Cuts tend to be the most common injury when doing science experiments with elementary students. If a child must use scissors, make sure you help them or do the cutting yourself. Pre-cutting everything will eliminate the risks.
- Be careful when using plants in an experiment: You will need to watch children closely while they are handling seeds. The reason for this is to ensure that they do not put them in their mouths. You will also need to make sure that they wash their hands after dealing with plants or seeds. This is important because plants and seeds are sprayed with fertilizers and insecticides. Please do research on the type of plant that you are using because there are many different types of plants that can cause sicknesses.
- Be cautious when bringing animals into your classroom for an experiment: A lot of young children do not know how to properly handle live animals, so you need to make sure to give a lesson on how to handle the animal or creature with care during the experiment. If a child does not want to touch the animal, that should be their choice. I do not recommend forcing a child to touch an animal. If they choose to participate, you should supervise closely. It is important to make sure animals are not mistreated or mishandled. In addition, do not bring wild animals into your classroom because they can have diseases that are dangerous to humans.
- Make sure that heating materials are not used by children to prevent burns: Anything that is hot should not be used by children. This includes hot water. If a cup is filled with hot water, do not let the student hold it. It can easily break or spill. It is best if only you handle the hot items.
- Anything that is broken or spilled should be cleaned up right away: It is OK if something gets broken or spilled. Make sure that the students move away from the area and do not touch. Everything will need to be cleaned up before they can go back to doing their experiment.
- Create an emergency plan for when things go wrong and go over this with students: You never know how a science experiment is going to go. It is wise to create an emergency plan and go over it with your students beforehand. This will help them know what to do when you say it is time to do the emergency plan. You will need an emergency plan in case any of the following accidents occur: burning, poisoning, allergic reactions, first-aid accidents, fire, spill, animal bite, etc.
Even if you are teaching remotely, there are science experiments that can be done in the comfort of your student’s home. Take a look at LAB 360’s other video showing you the experiments that little ones will enjoy doing at home.
During a science experiment, children may get loud and rowdy because they are excited. Every student must be able to hear you to ensure that they are being safe while participating in the science experiment. Therefore, my advice is to purchase a voice amplifier for these specific activities. These devices will make your voice loud and clear so that each student can hear you and comprehend everything you are saying at all times.
Useful Resources
- Classroom Science Lab Equipment
- How to Teach with Classroom Experiments
- 12 Competitions To Get Your Students Fired Up About STEM
Conclusion
I hope this article helped you come up with several fun science experiments for elementary school. No matter the age of the child, there are always ways to get them involved with learning about science. All teachers should put away the books and worksheets from time to time and do some science experiments to get their students motivated, alert, and learning. I guarantee that they will also be smiling and laughing while doing these hands-on experiments, which is a win-win for you! Good luck and happy experimenting!
- 14 Science Experiments for Middle School — Unlock the Wonders of The World in Your Classroom - February 18, 2023
- Top 11 Sound and Voice Amplifier Apps: Enhance Audio on Your Device with the Best Volume Boosters - January 26, 2023
- 7 Creative Valentine’s Day Poster Ideas to Make Your Space Feel More Festive - January 11, 2023
As a science teacher, what is your favorite lab experiment?
My favorite? There are so many to choose from. But I’ll go with a really simple one that I absolutely love:
You take 6 test tubes and put the same amount of vinegar in each. Into 6 identical balloons, you add six increasing amounts of baking soda. You put the balloons on the test tubes and then predict what will happen when they are all flipped up.
Prediction? The balloons will get progressively bigger.
Reality? The last three balloons are the same size.
Blows. Kids’. Minds.